Hobo SEO Dashboard in Google Sheets is a tool that helps marketers, SEOs and website developers explore and analyse Search Console data on any website directly in Google Sheets.
It will autonomously run regular reports on every account in your Google Search Console to a schedule you set.
You can buy Hobo SEO Dashboard now.
When set up, you can rely on it to publish and update SEO audit reports for every client.
Hobo SEO Dashboard uses 4 Google APIs to run in Google Sheets (for setup):
- Google Search Console API
- Google Pagespeed API
- Google Drive API
- Google Docs API
Ensure all APIs are set up when you go through the setup procedure (all are listed in the video above, although adding Google Drive API is missing from the video.
Ensure all 3 are set up to run properly.
Follow this guide to start or read the full SEO Dashboard Installation guide to get your SEO Dashboard up and running.
Step 1 – Make a copy of your master sheet
Step 2 – How to set up Google APis to work
Hobo SC is designed to work within Google’s free API limits, even on a personal Gmail account. It was developed on a free account and still is. It takes moments to setup.
Set up your Google Apis first, then come back and go to the next video.
How to set up
It only takes a few minutes for you to set up Hobo SC in Google Sheets and you can start navigating your Search Console clients.
Add Google Pagespeed testing and SEO tools
How to select and navigate clients
How to run winners and losers reports for keywords and URLs
Hobo SEO Dashboard is an autonomous SEO reporter, and easy to set up.
If you are an SEO or web developer or an SEO manager who manages many sites in Search Console and prefers to work in spreadsheets, this is for you.
Using Hobo SEO Dashboard you can quickly:
- Manage reporting on multiple Search Console accounts.
- Access Google APIs.
- Create and run your own reports.
- Analyse and store as much data as limits permit.
- Analyse winner and loser reports for URLs.
- Track and monitor rankings.
- Perform an SEO audit.
- Most importantly for later, start to gather Client project data in a central Spreadsheet.
- Set up scheduling, regular email reports and email traffic alerts (not in Beta versions).
… and all in Google Sheets, which turns out, to be an incredibly cost-effective way to perform a quality audit on any website, without the need for other expensive tools.
You can buy Hobo SEO Dashboard now.
Here’s an example of some of the reports rolling out in Hobo SC (Search Console in Google Sheets) in Hobo SEO Dashboard.
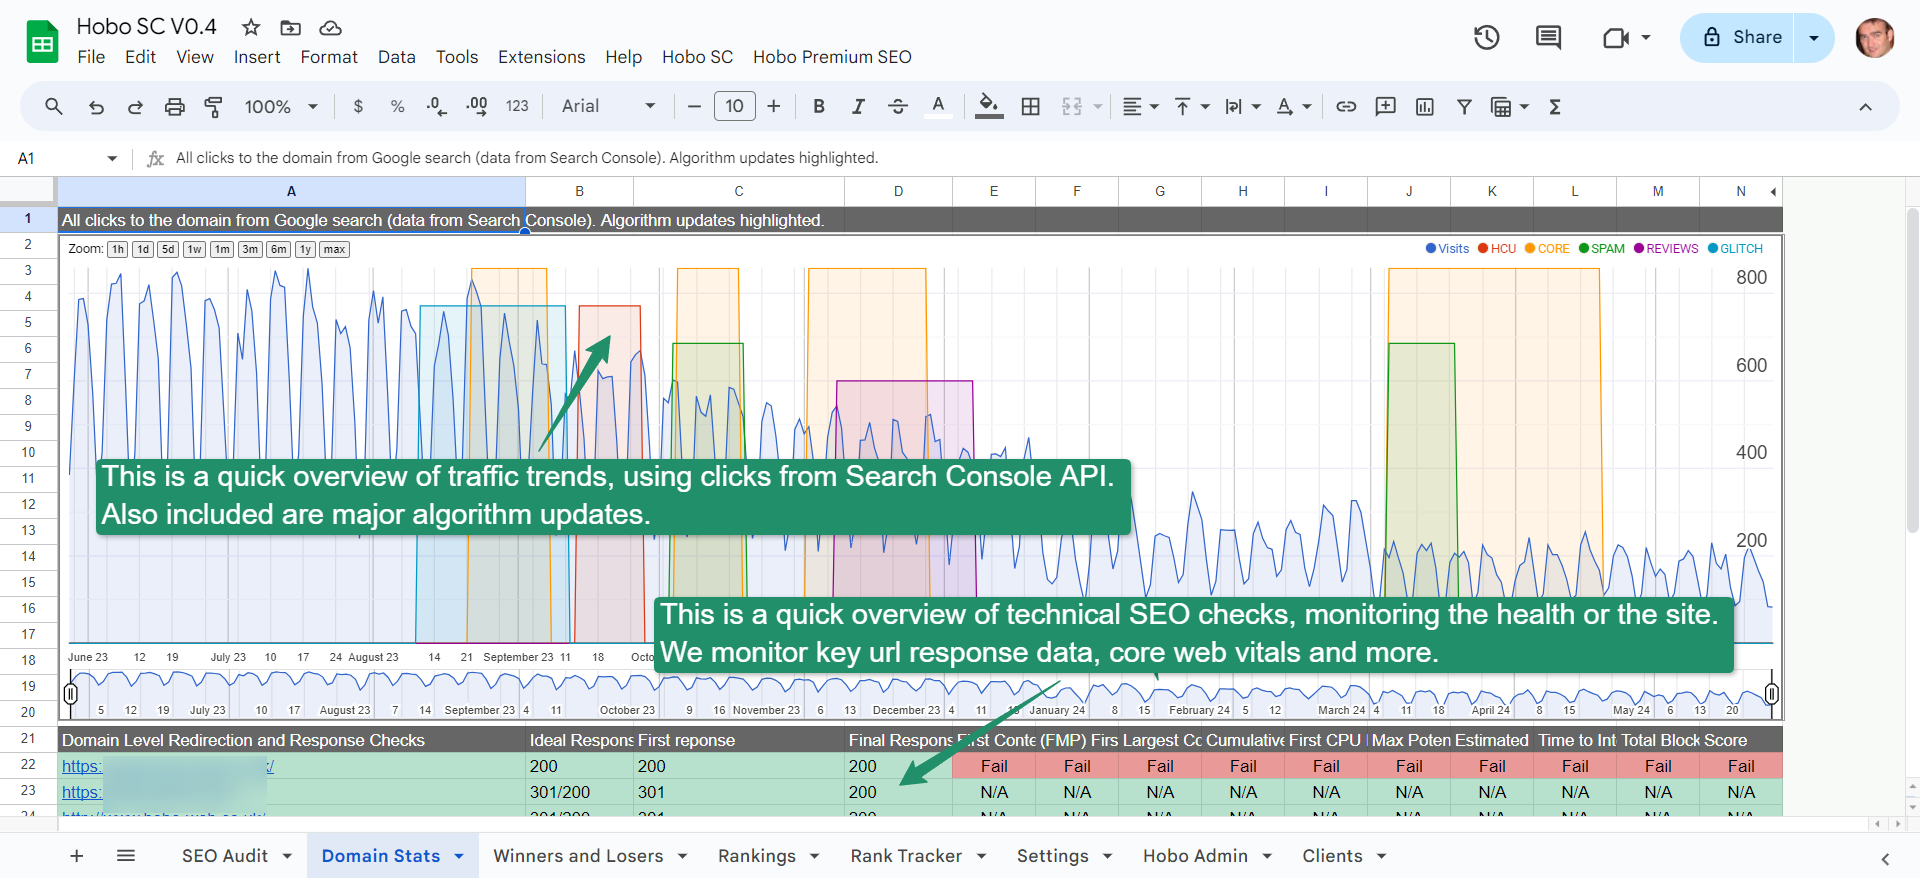
Domain Traffic Traffic Trend Report
A quick overview of domain performance using click data from Search Console mapped to algorithm updates.
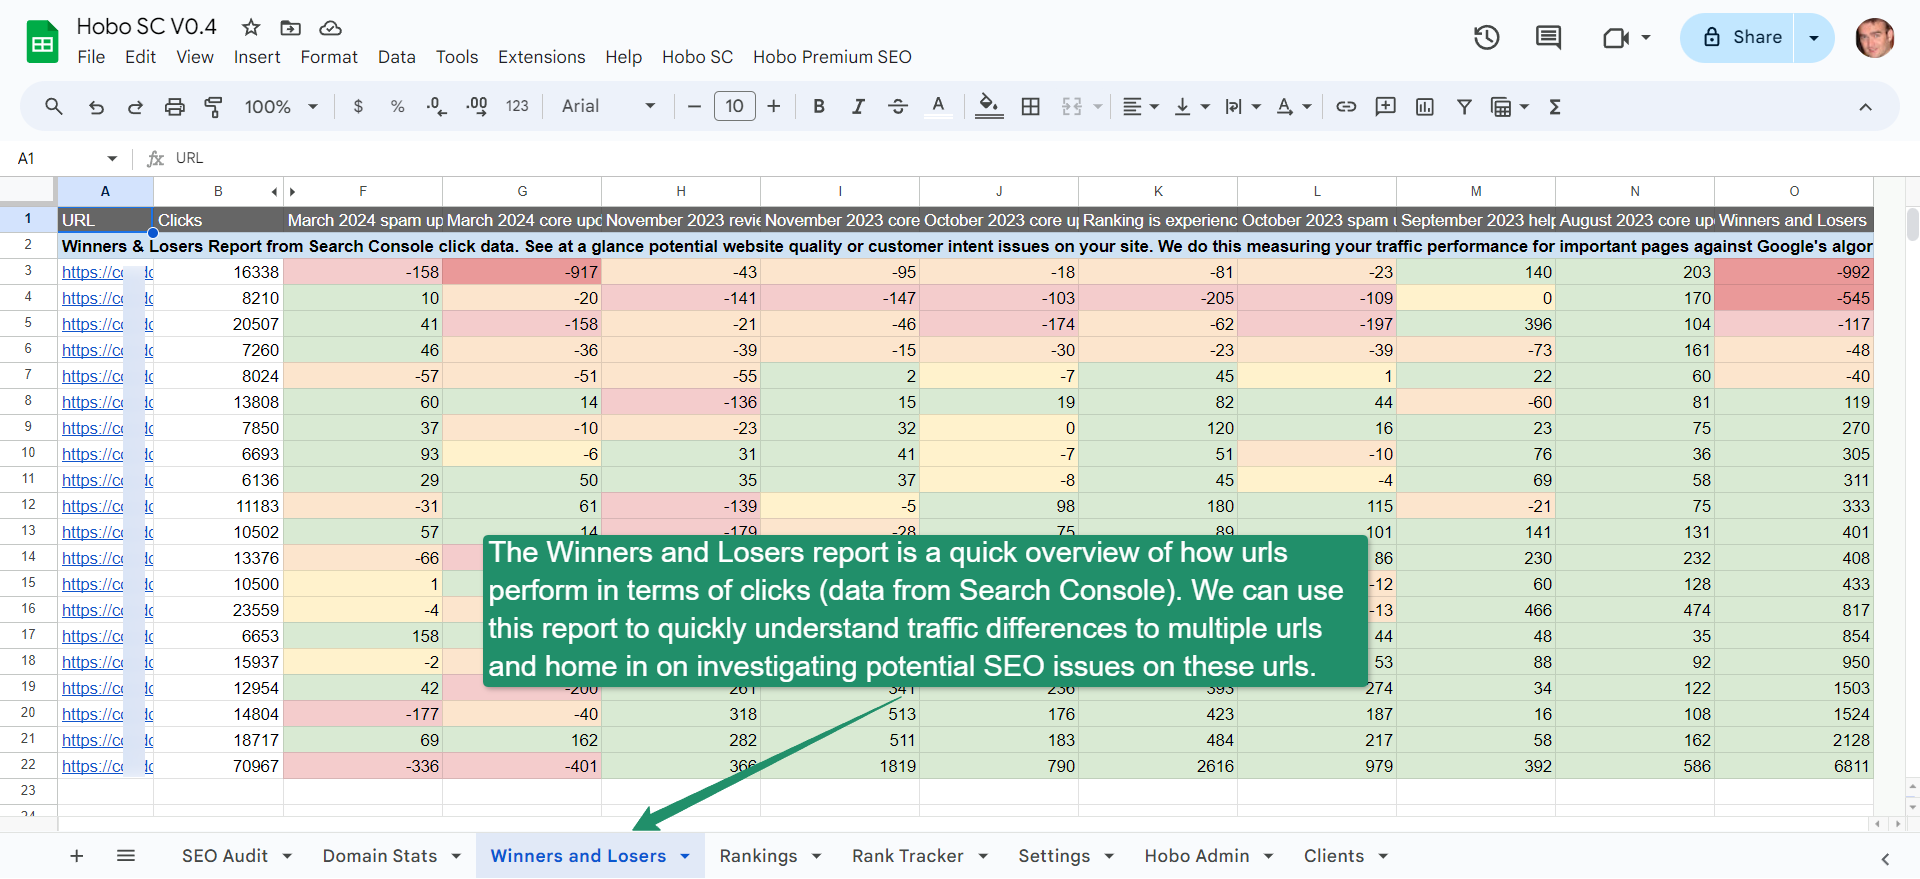
Winners & Losers Report
A quick overview of URL performance through algorithm updates using click data from Search Console mapped to algorithm updates.
…and there are a lot more.
Useful link
- Your Google Cloud Dashboard.
How to set up Search Console Api
Set up a new project in the Google Cloud console using a Personal Gmail account and free API allowance.
This is more than enough to generate these reports.
NOTE: This post presumes you have not set up any projects in Google Cloud.
How to Set Up using a Personal Gmail Account
Set up a new project in the Google Cloud console in a few moments.
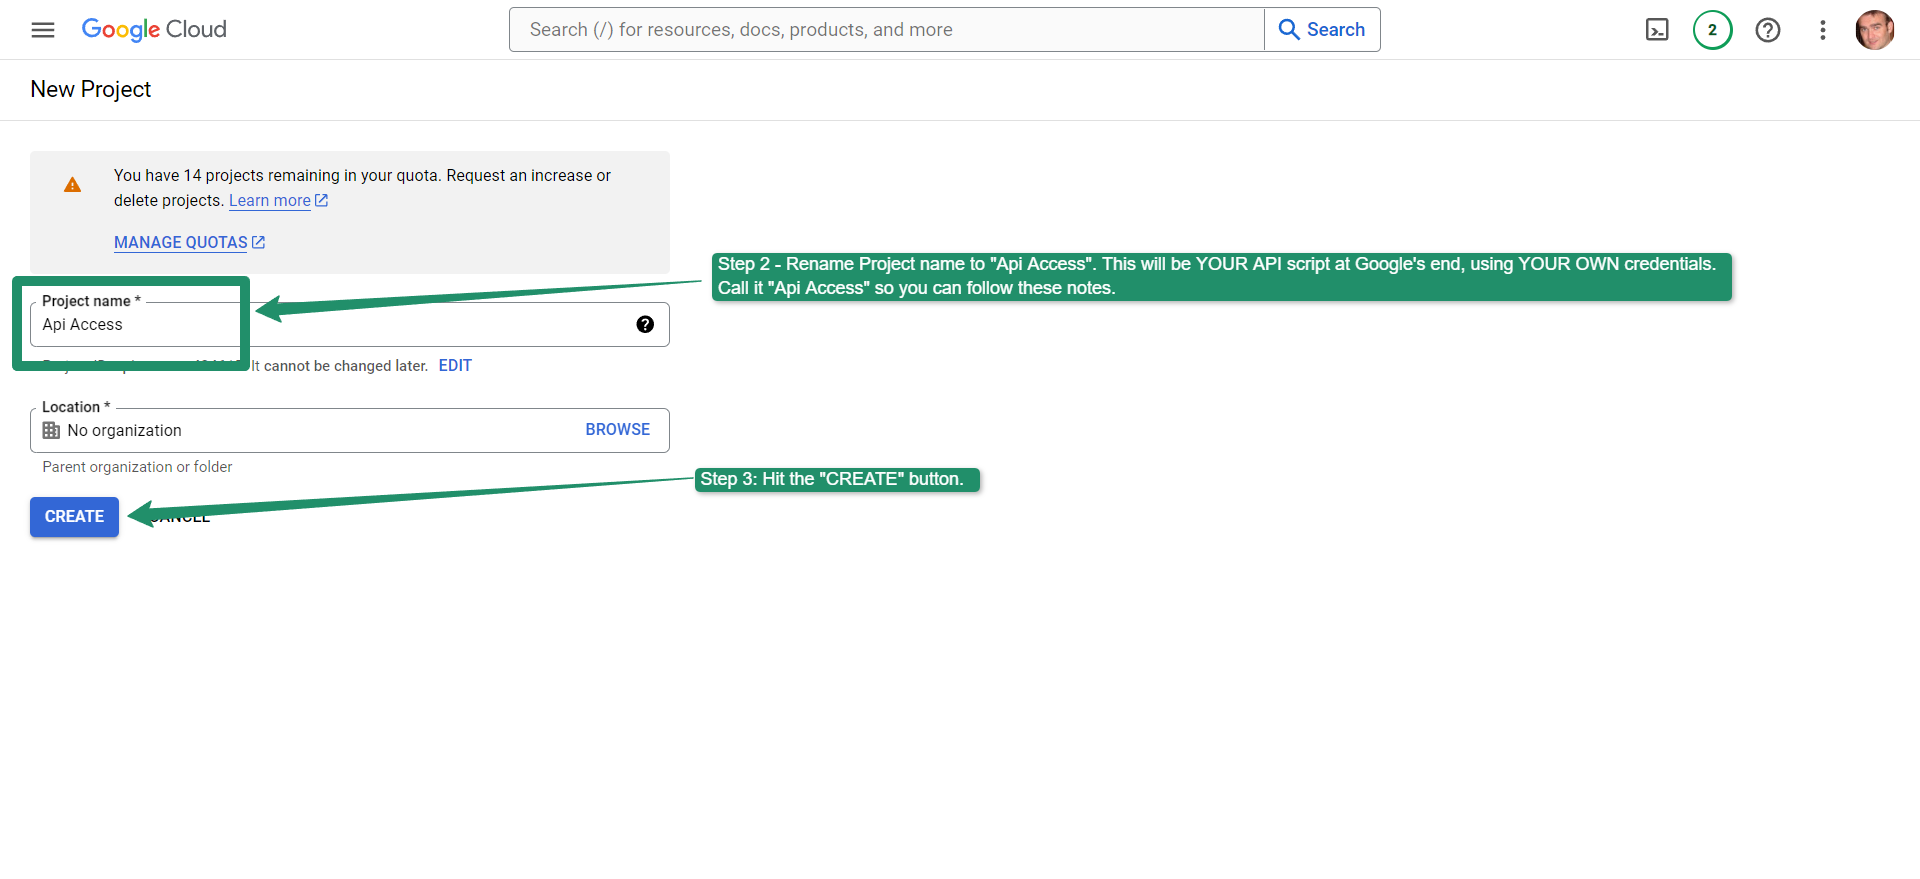
Step 1-3
- Go to your Google Cloud Console to create a new project:
- Name the project to “Api Access”. This will be your API script at Google’s end, using your own credentials. Naming it “Api Access” will help you follow these notes. (See image below)
- Hit the “CREATE” button. (See image below)
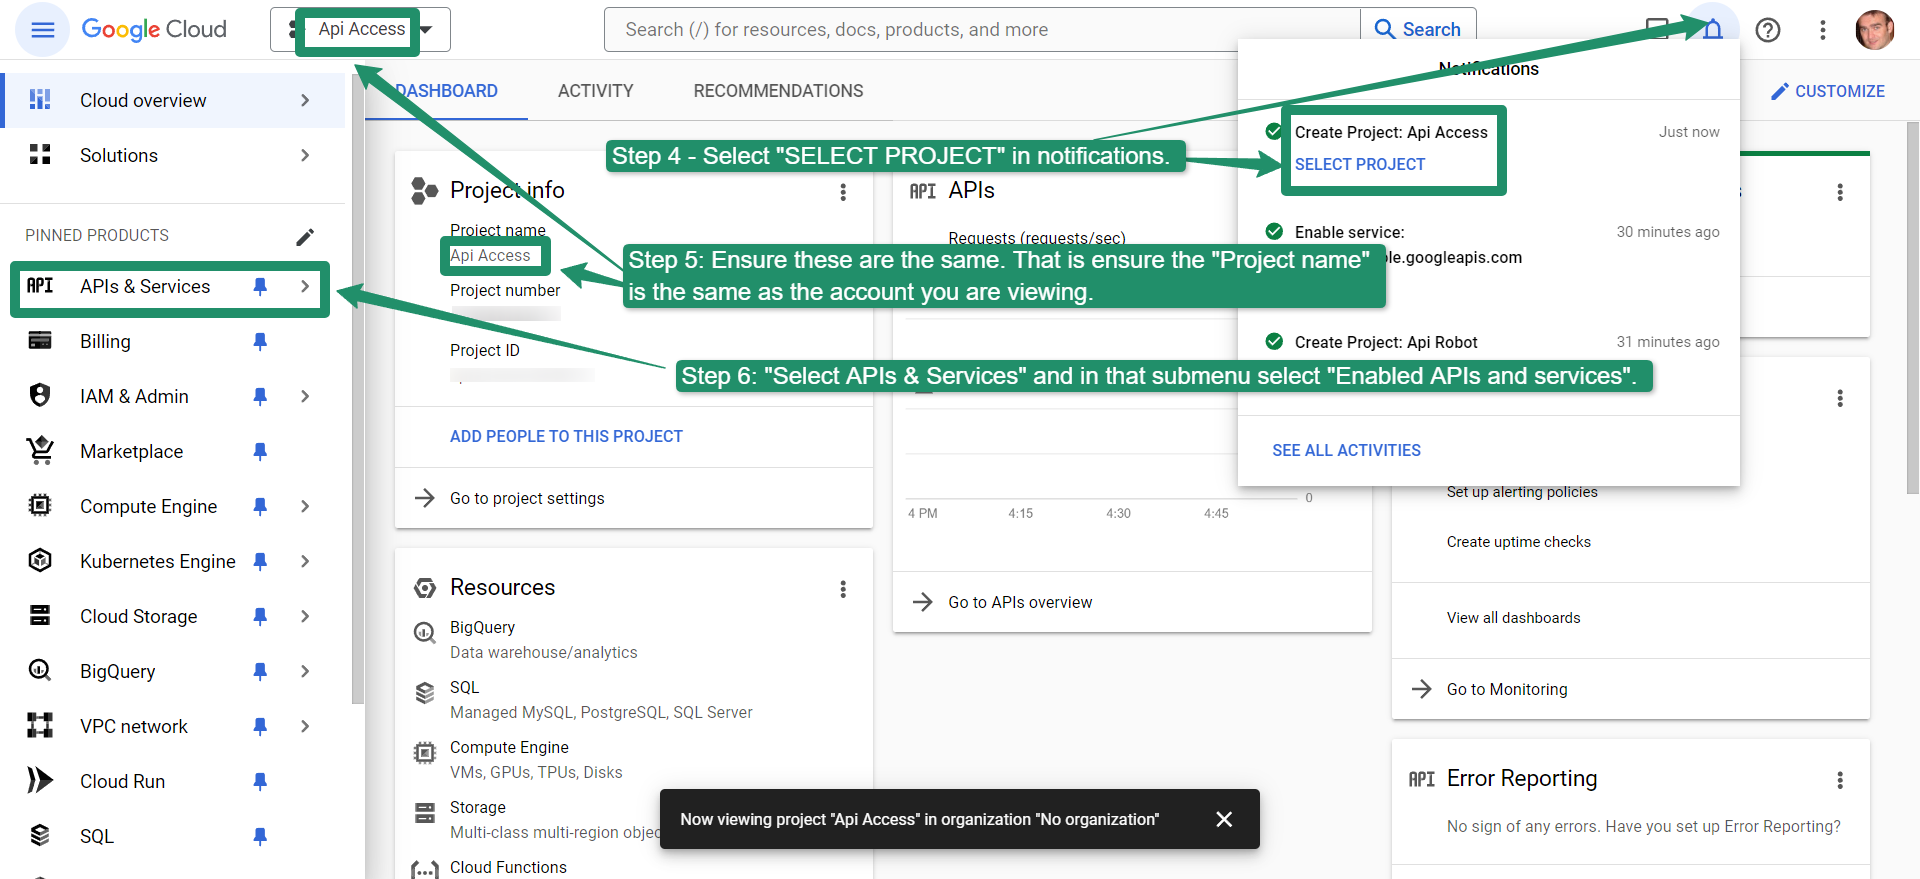
Step 4-6
- Select “SELECT PROJECT” in the notifications. (See image below)
- Ensure the “Project name” is the same as the account you are viewing. (See image below)
- Select “APIs & Services” and in the submenu, select “Enabled APIs and services”. (See image below)
Step 7
- Select “Enable APIs and Services”.

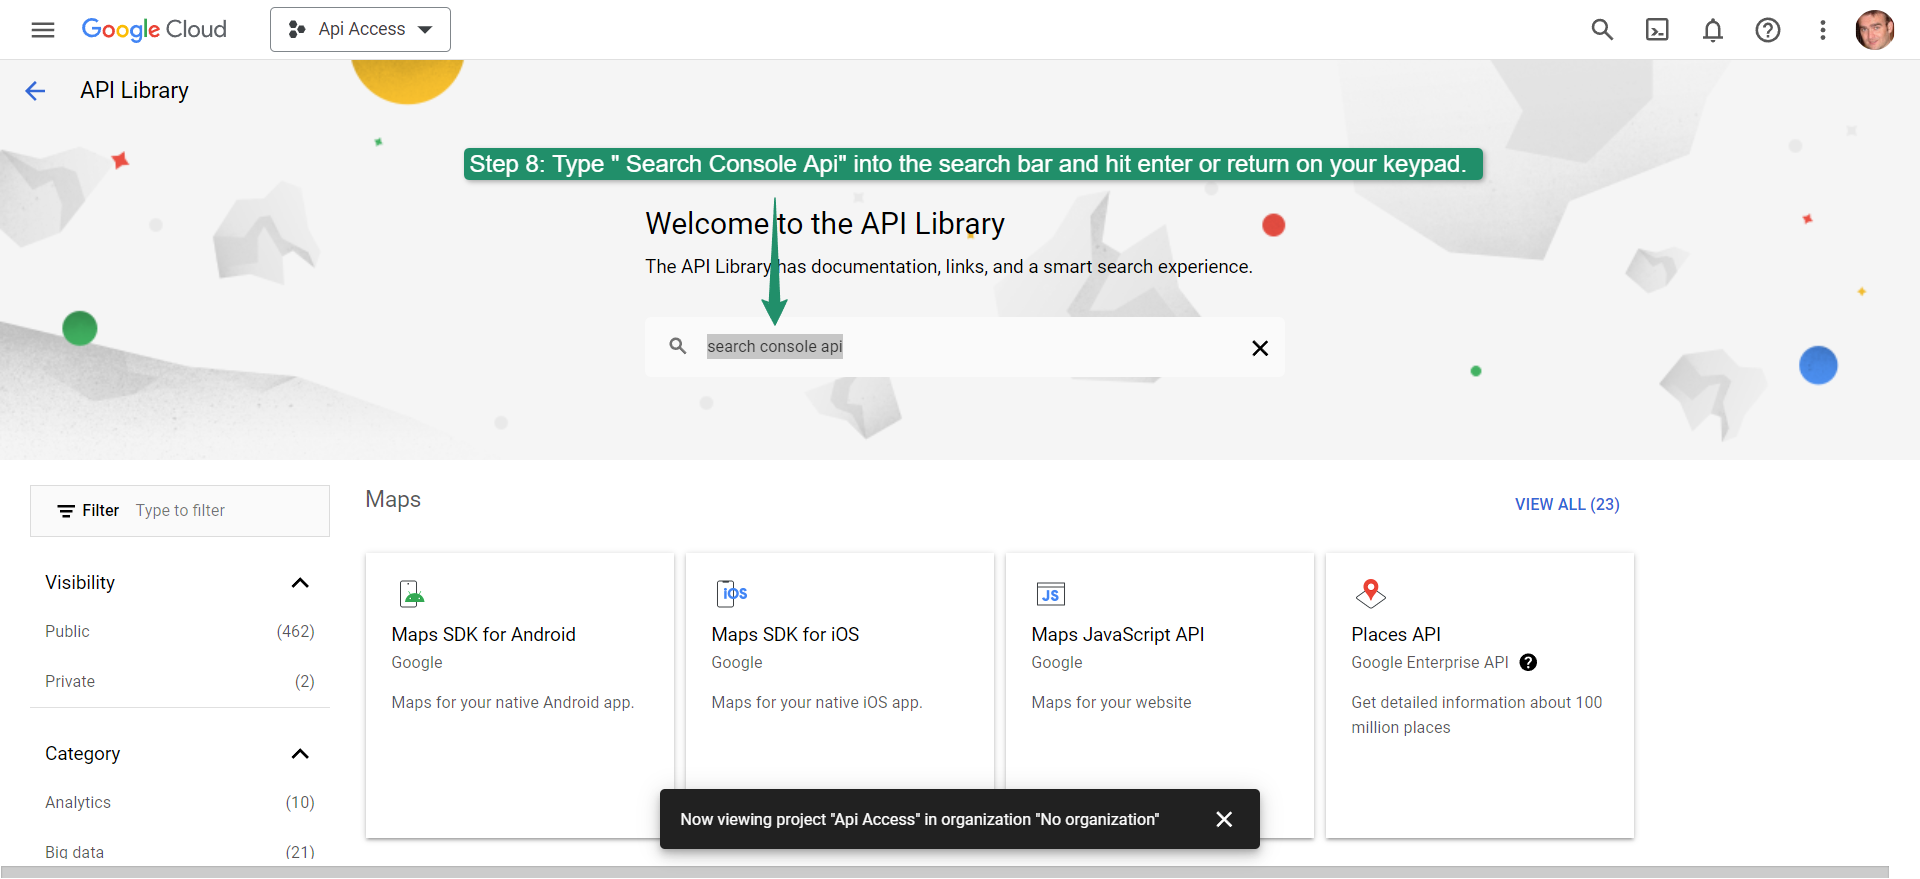
Step 8
- Type “Search Console API” into the search bar and hit enter or return on your keypad.
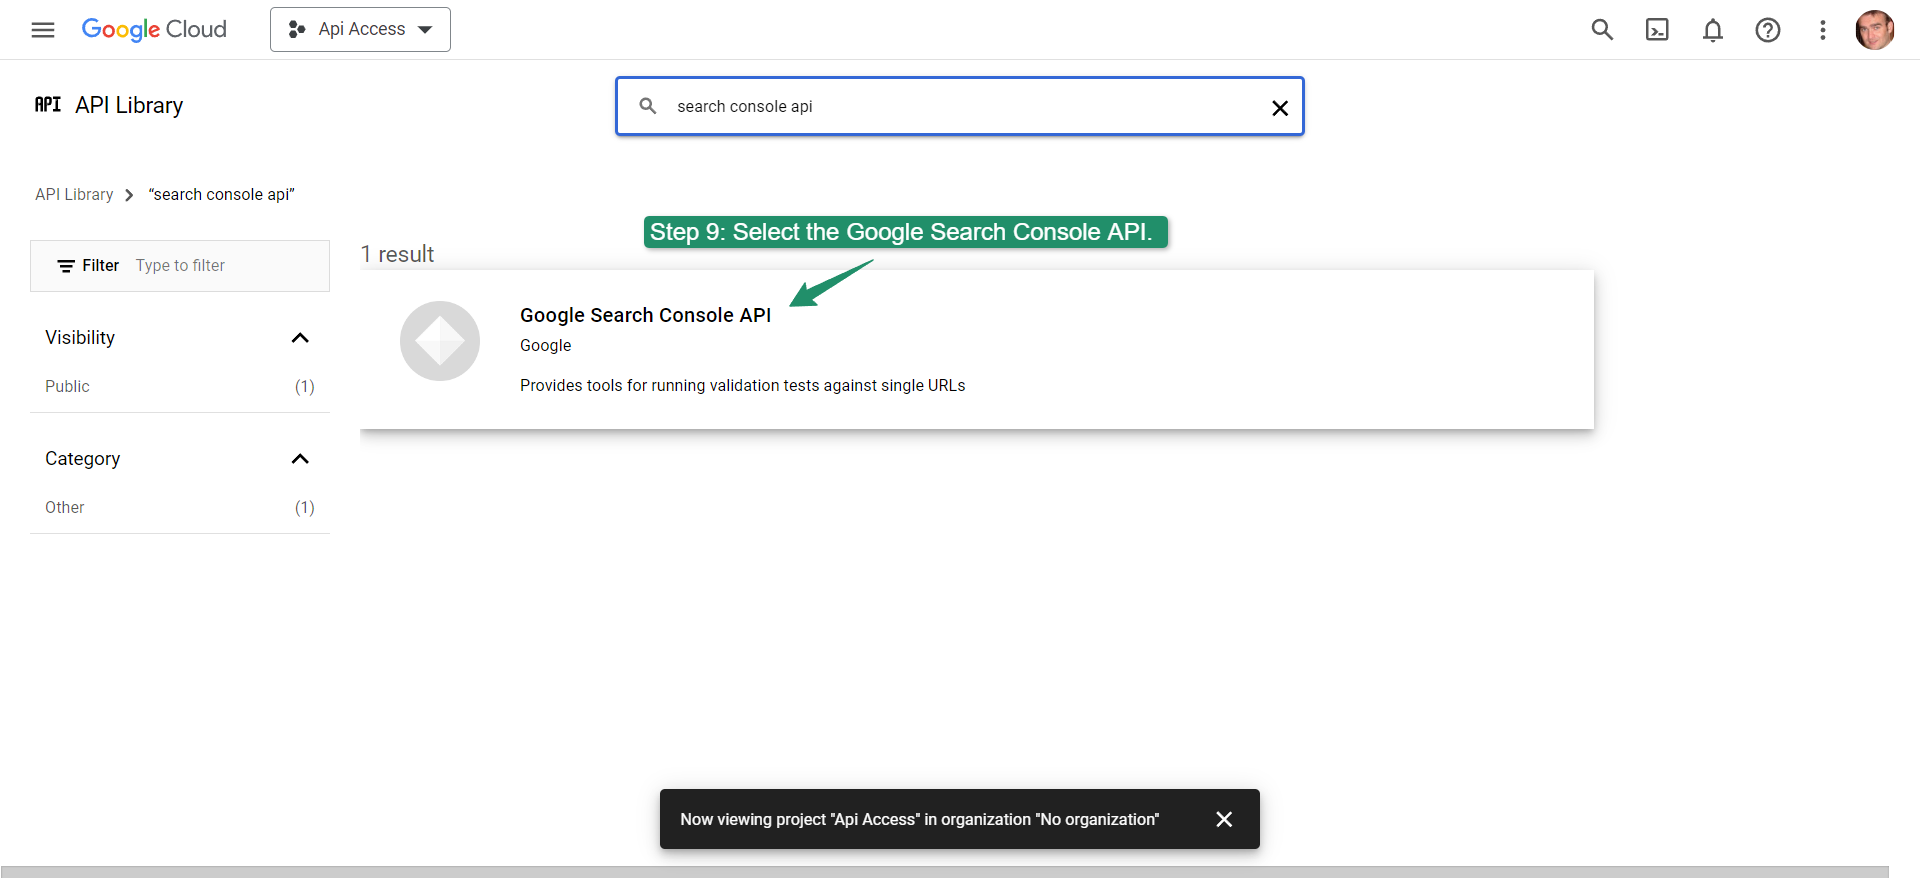
Step 9
- Select the Google Search Console API.
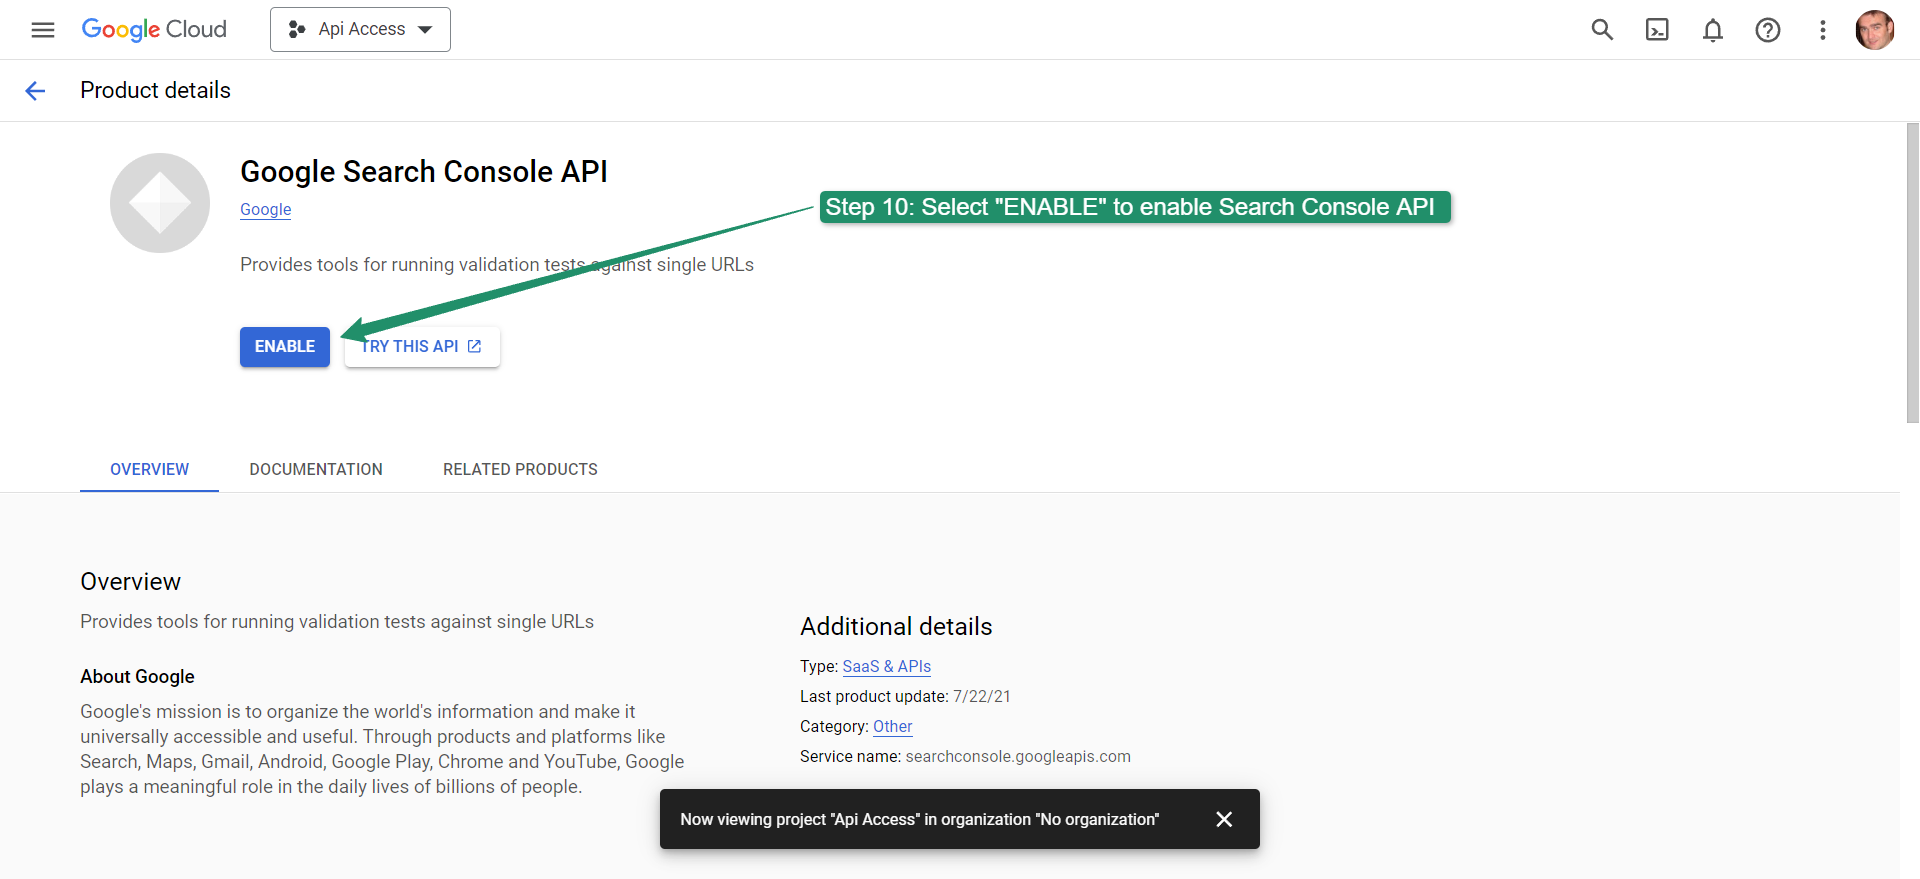
Step 10
- Select “ENABLE” to enable the Search Console API.
Step 11
- Select the “Google Cloud” logo.

Step 12
Copy the “Project number”
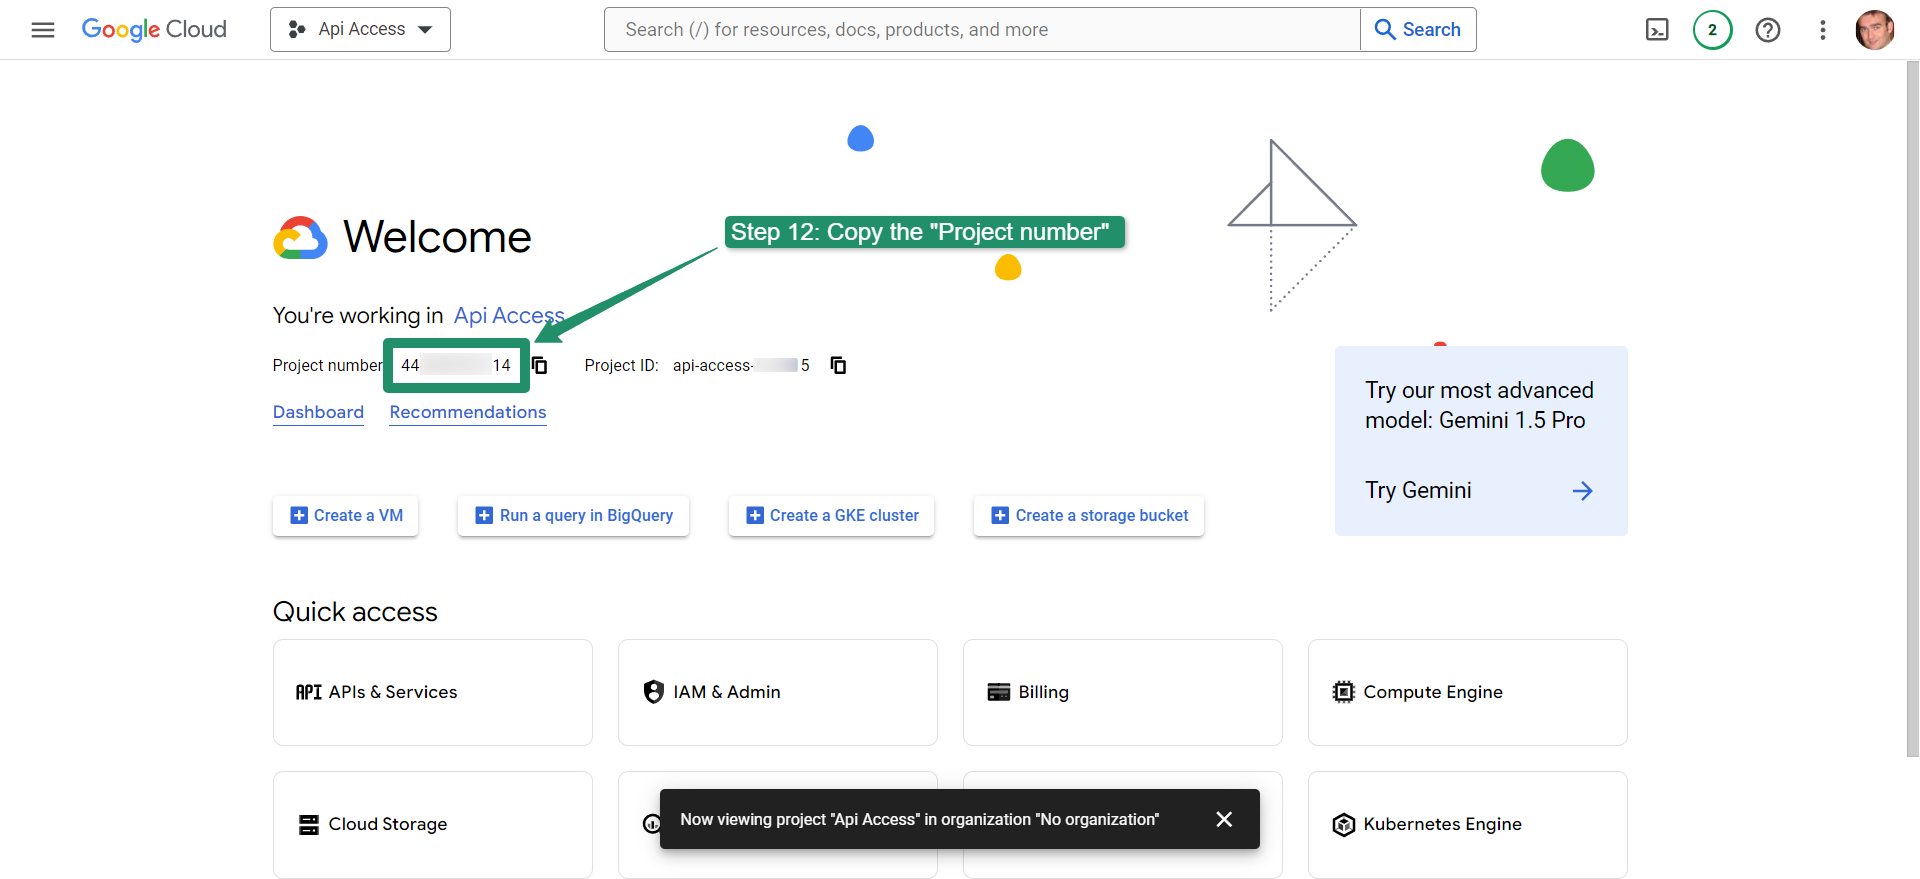
You have now created your project in Google Cloud with your own credentials and have activated the Search Console API. You also now have the “Project number” copied to the clipboard.
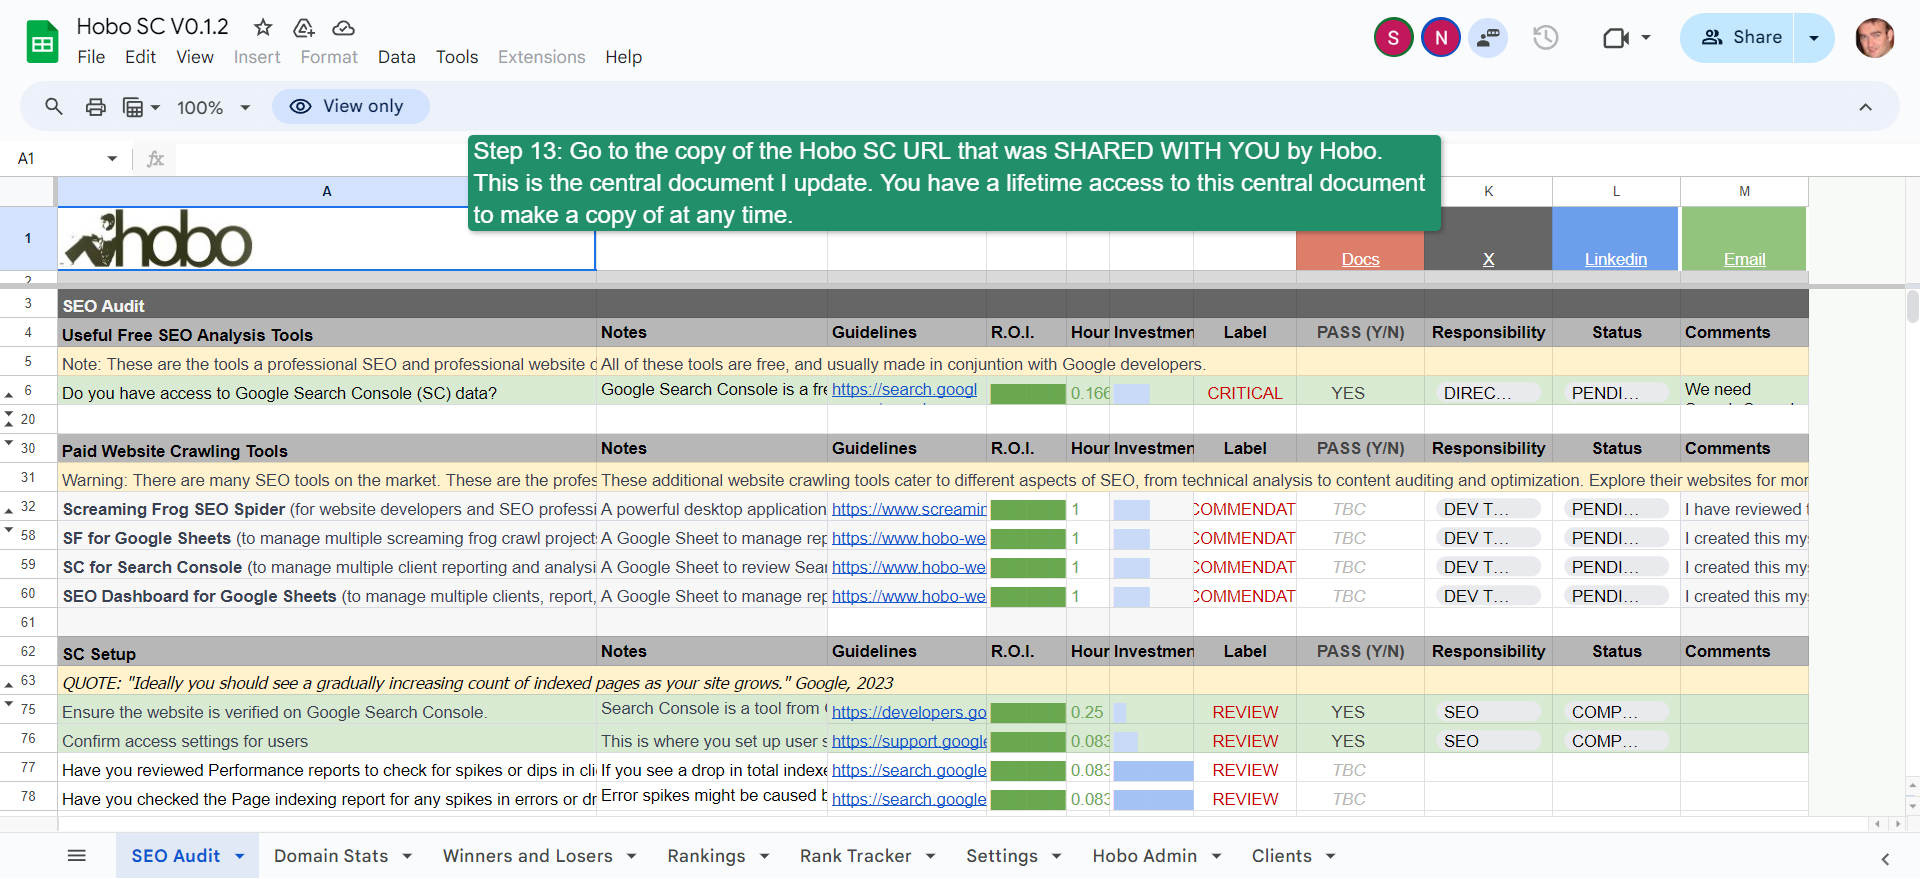
Step 13
- Go to the copy of the Hobo SC URL that was SHARED WITH YOU by Hobo. This is the central document I update. You have a lifetime access to this central document to make a copy of at any time.
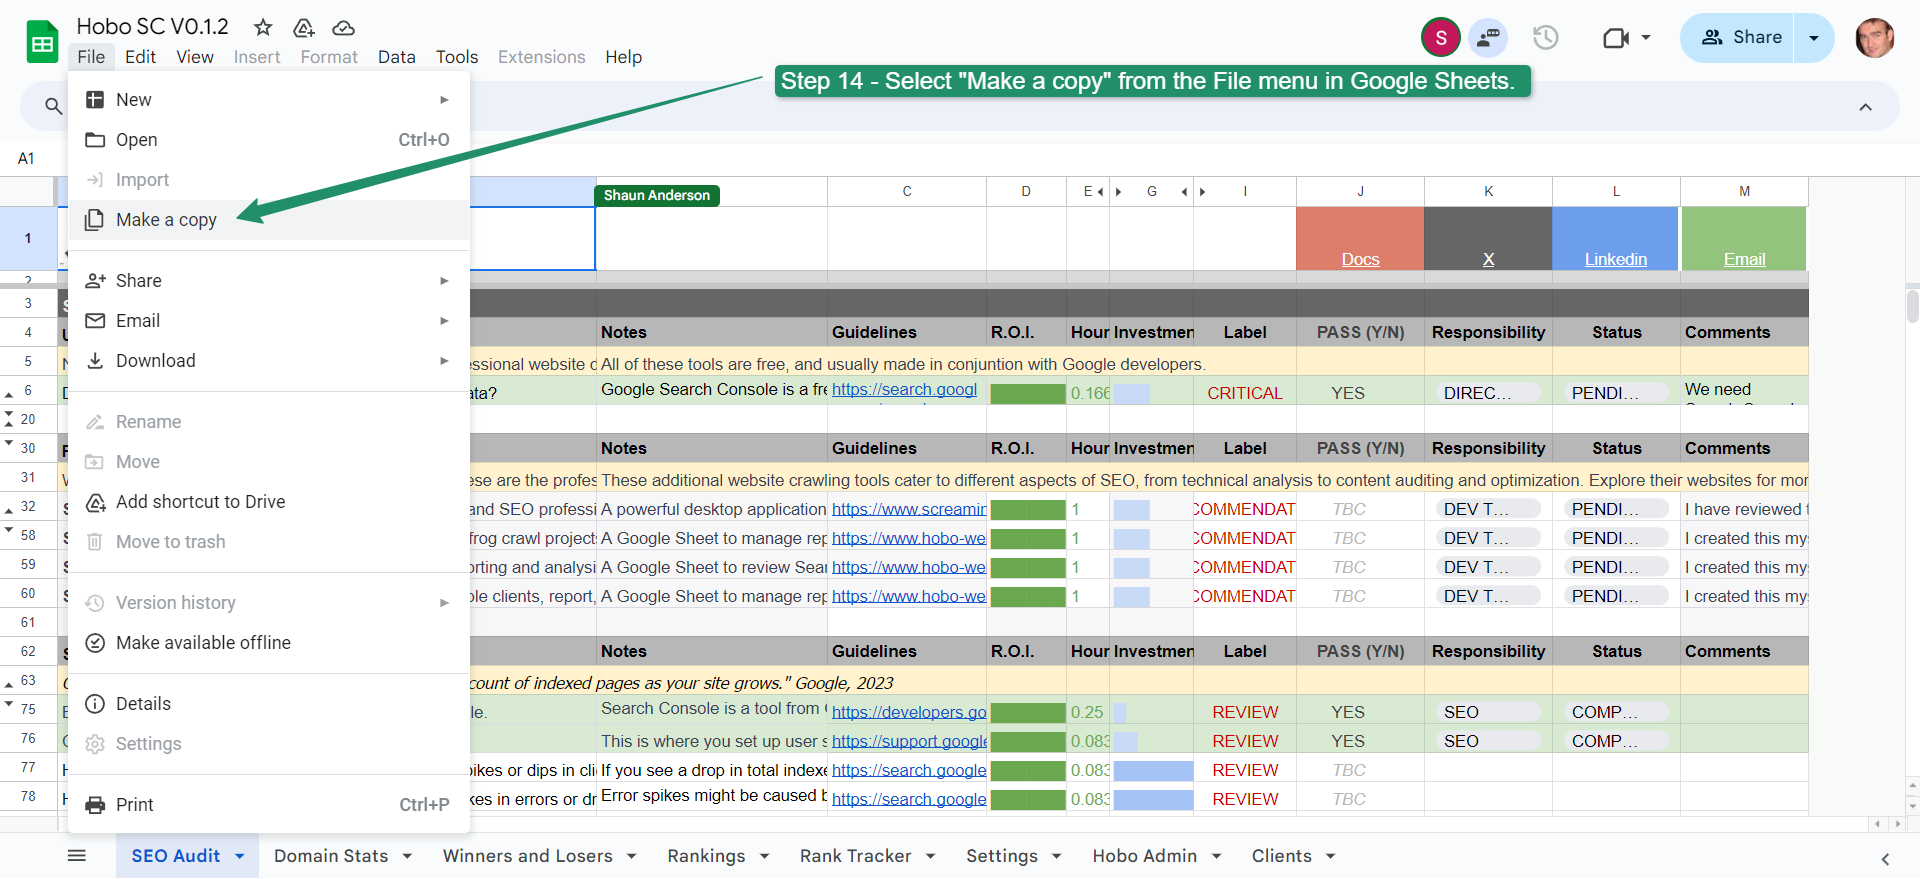
Step 14
- Select “Make a copy” from the File menu in Google Sheets.
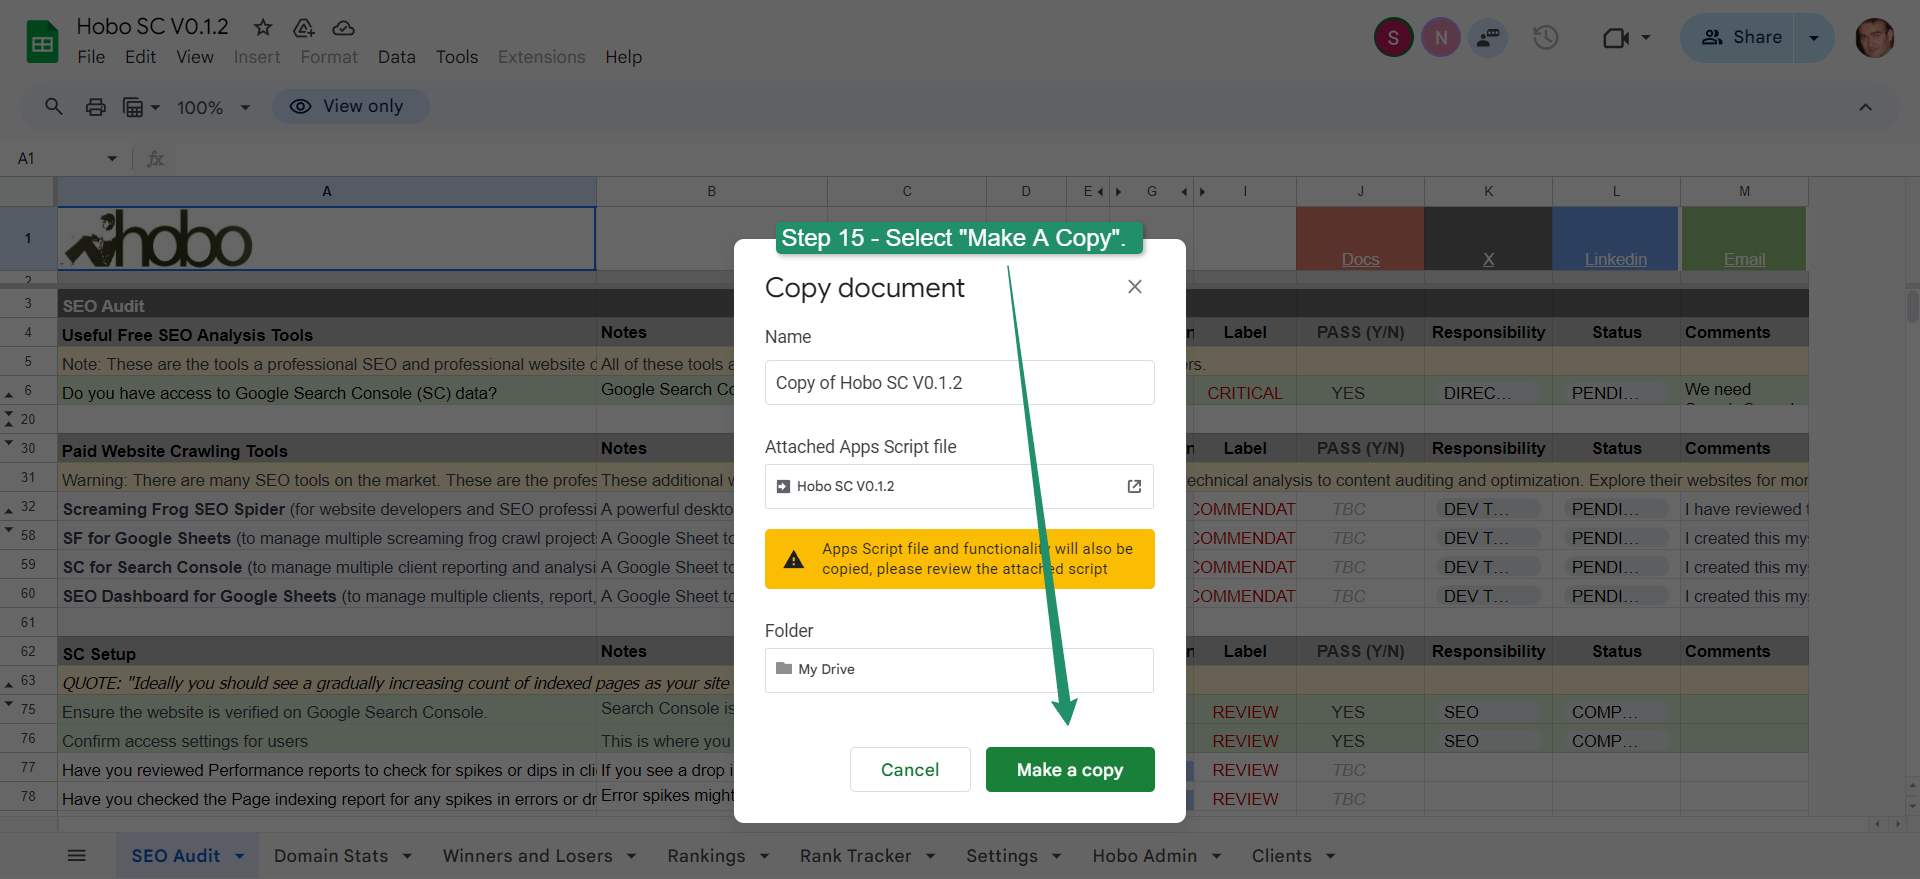
Step 15
- Select “Make A Copy”.
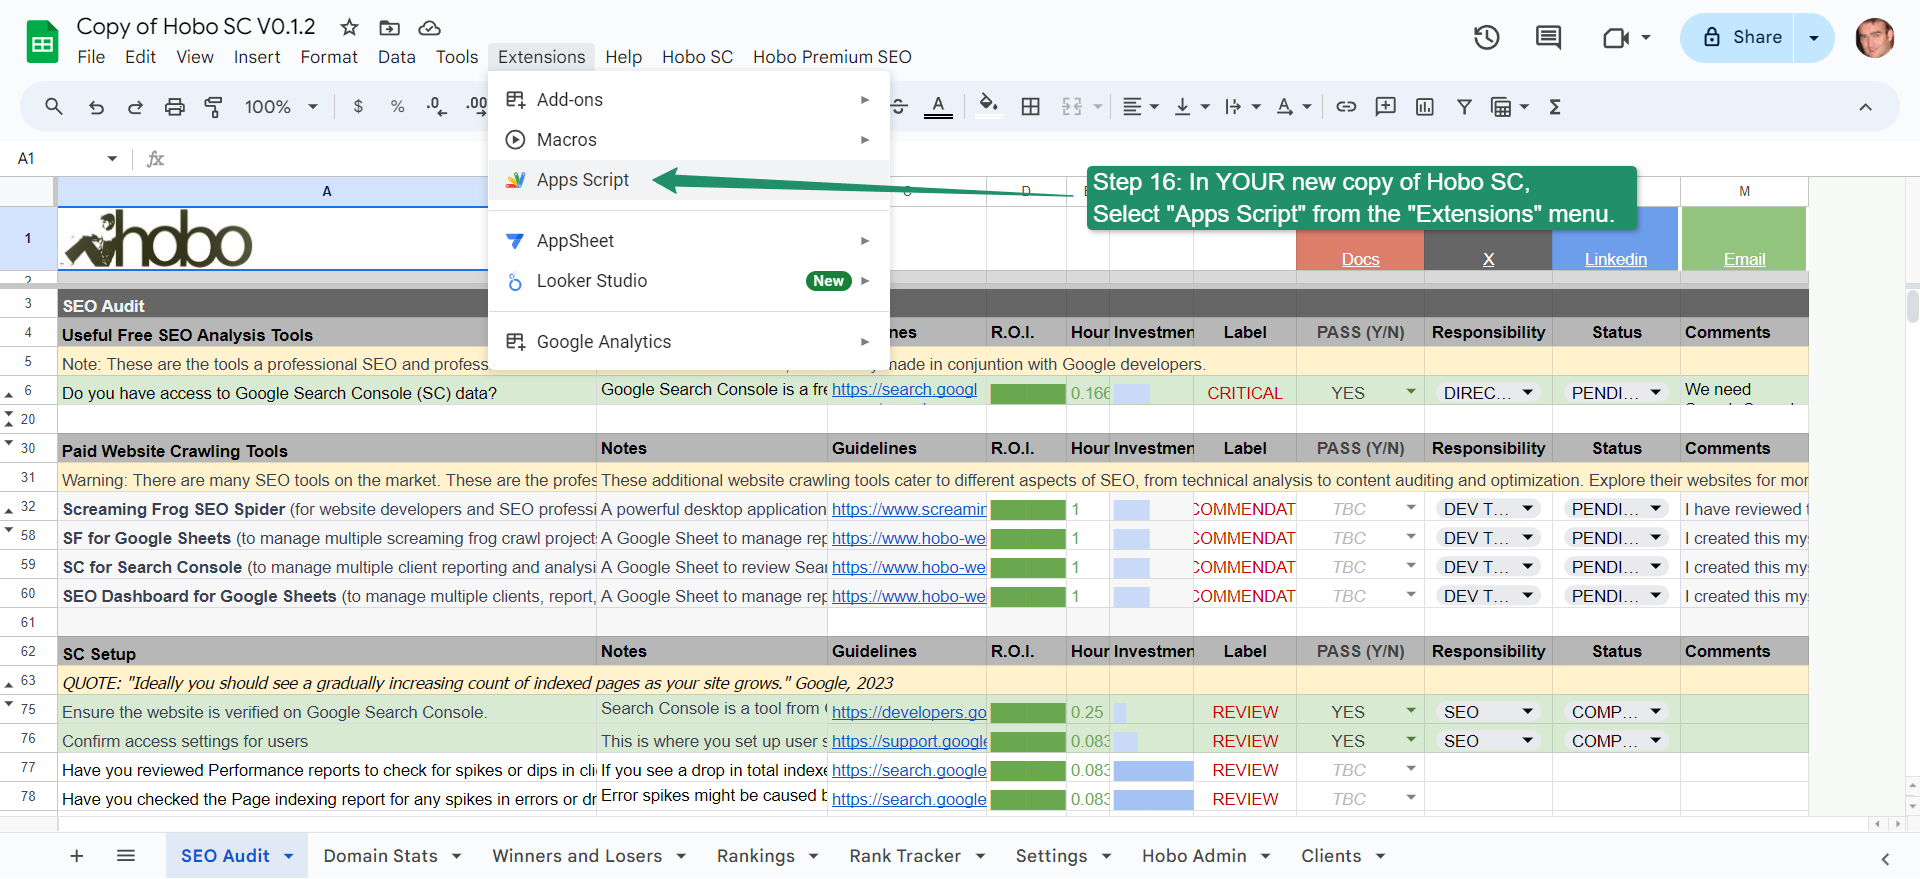
Step 16
In YOUR new copy of Hobo SC, Select “Apps Script” from the “Extensions” menu.
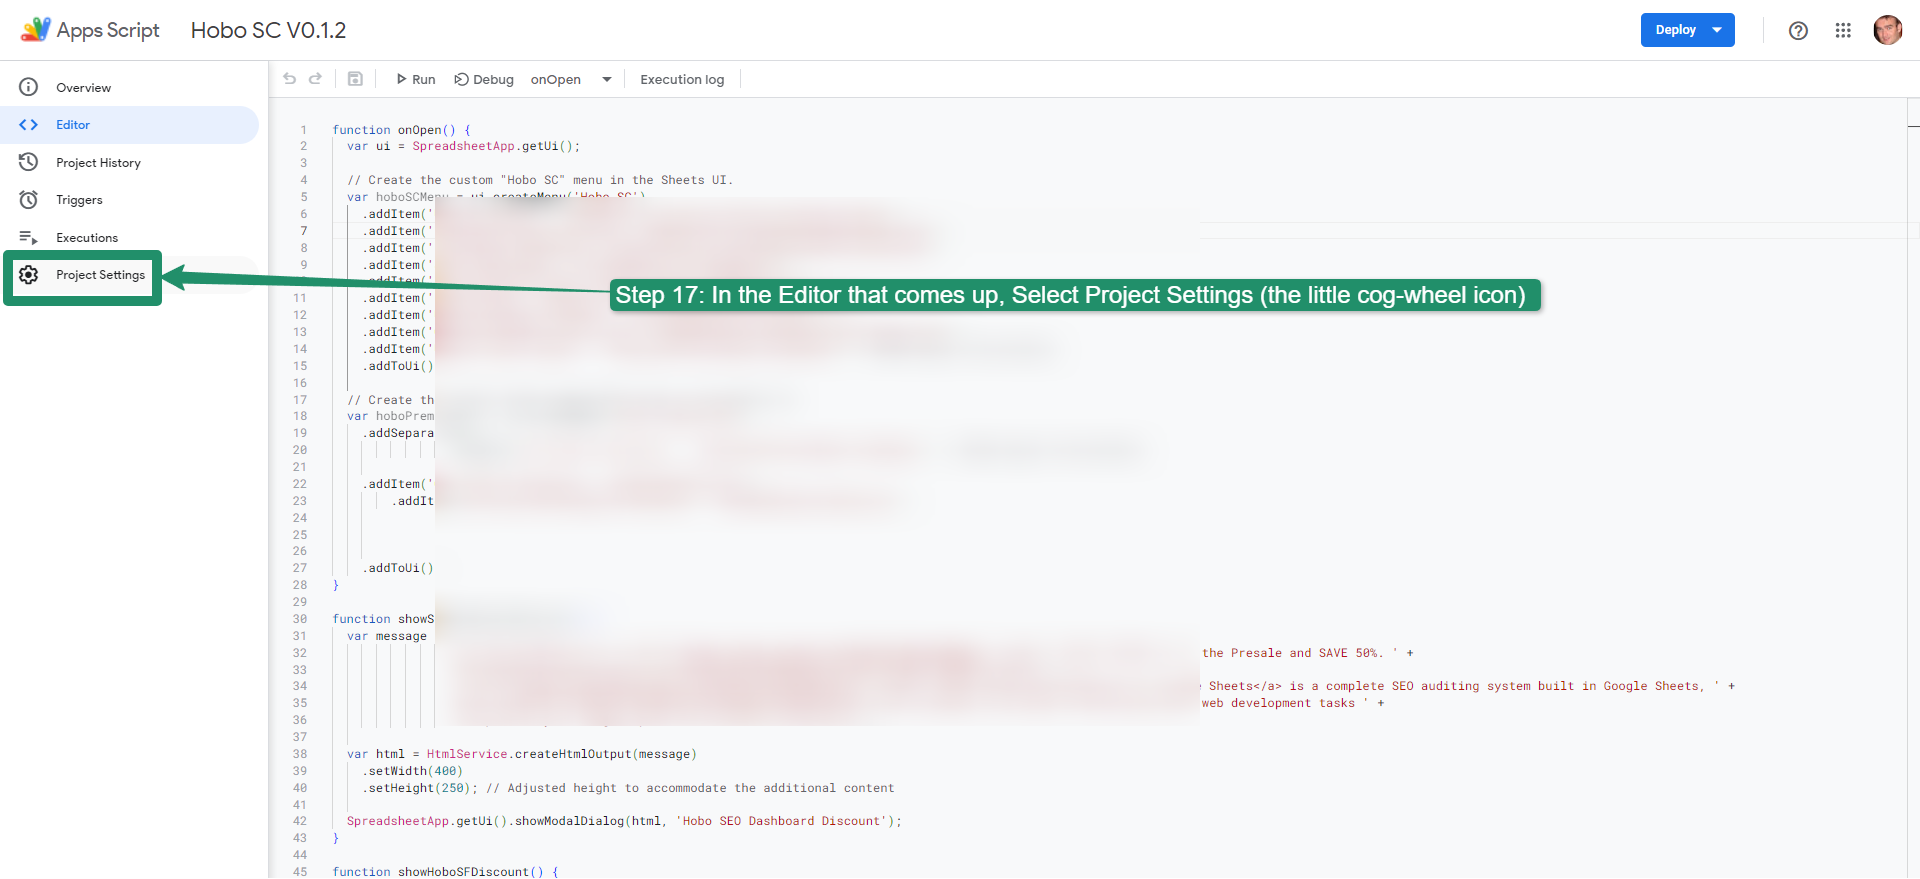
Step 17
In the Editor that comes up, Select Project Settings (the little cog-wheel icon)
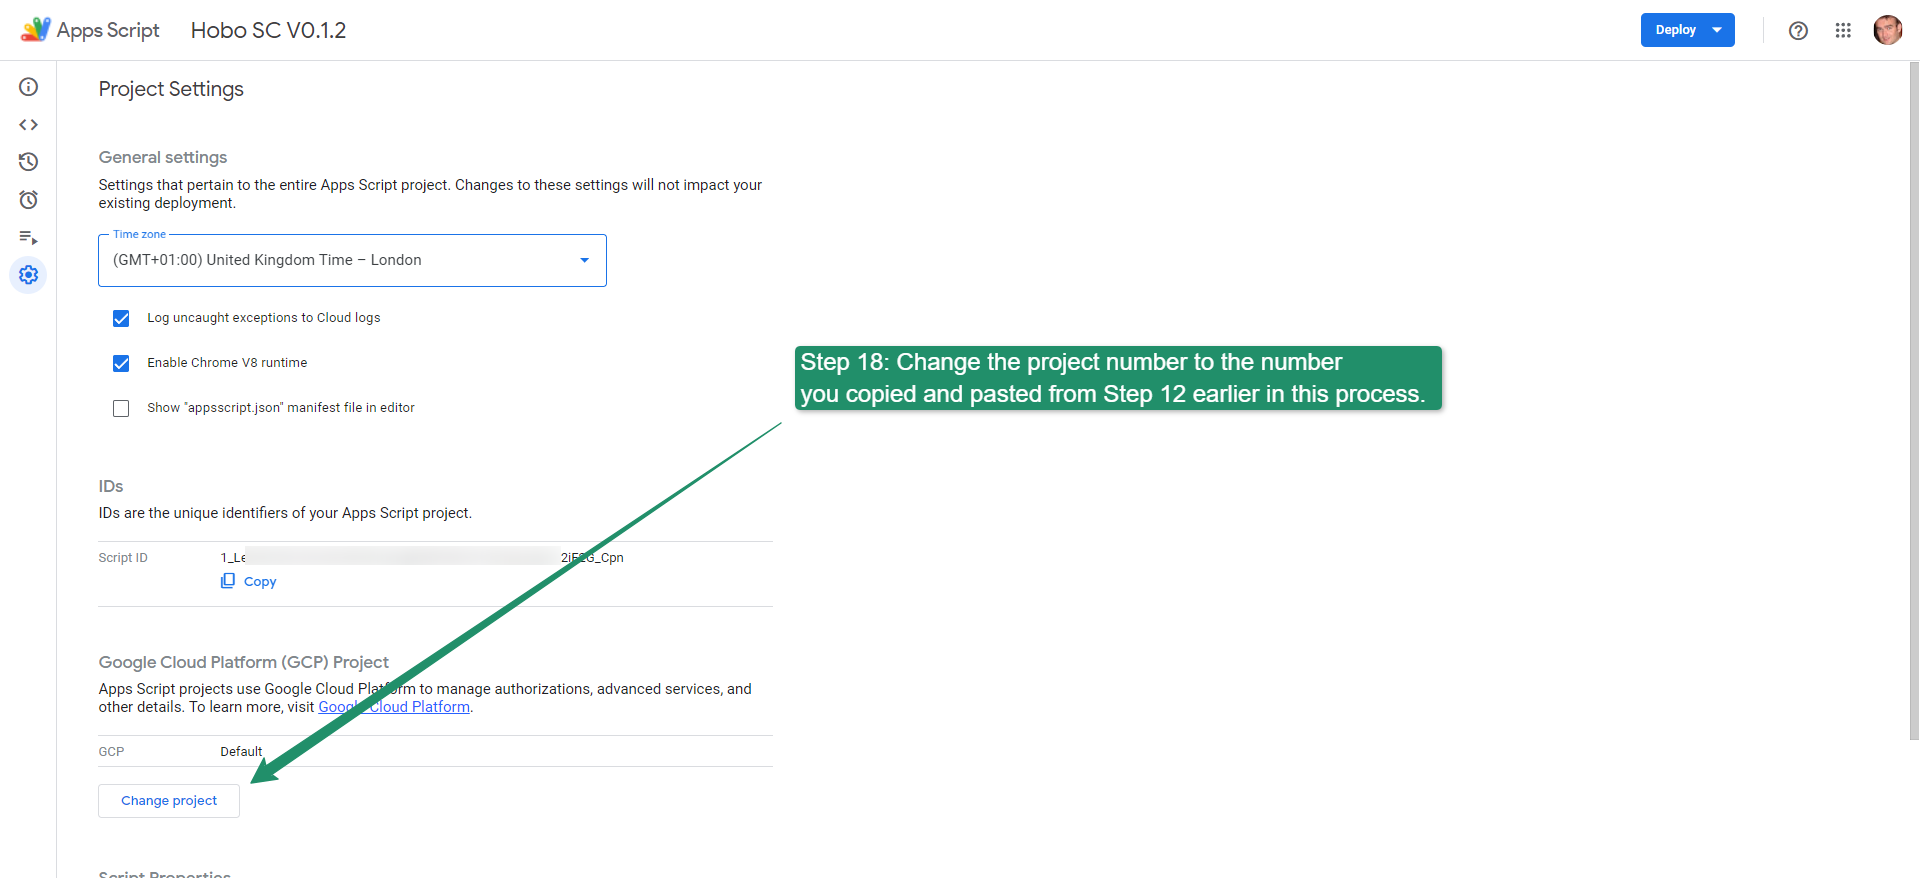
Step 18
In Project Settings, change the project number to the number you copied and pasted from Step 12 earlier in this process.
Step 19
Select the Set project button.

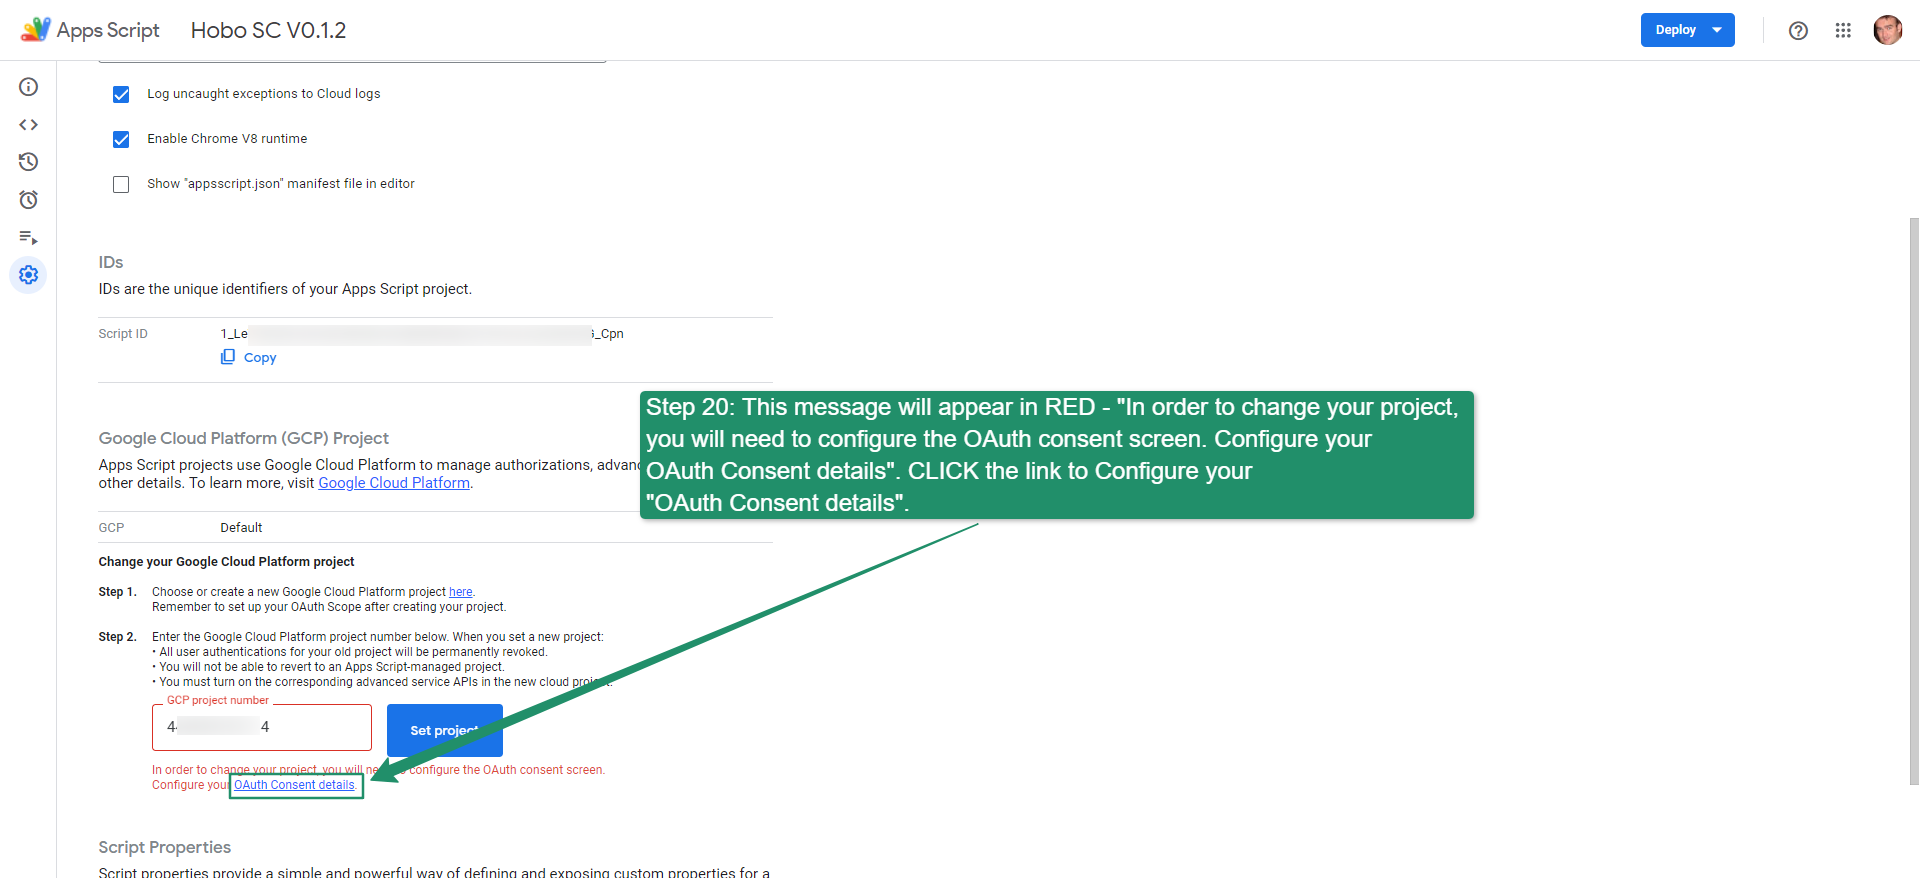
Step 20
This message will appear in RED – “In order to change your project, you will need to configure the OAuth consent screen. Configure your OAuth Consent details”. CLICK the link to Configure your “OAuth Consent details”.
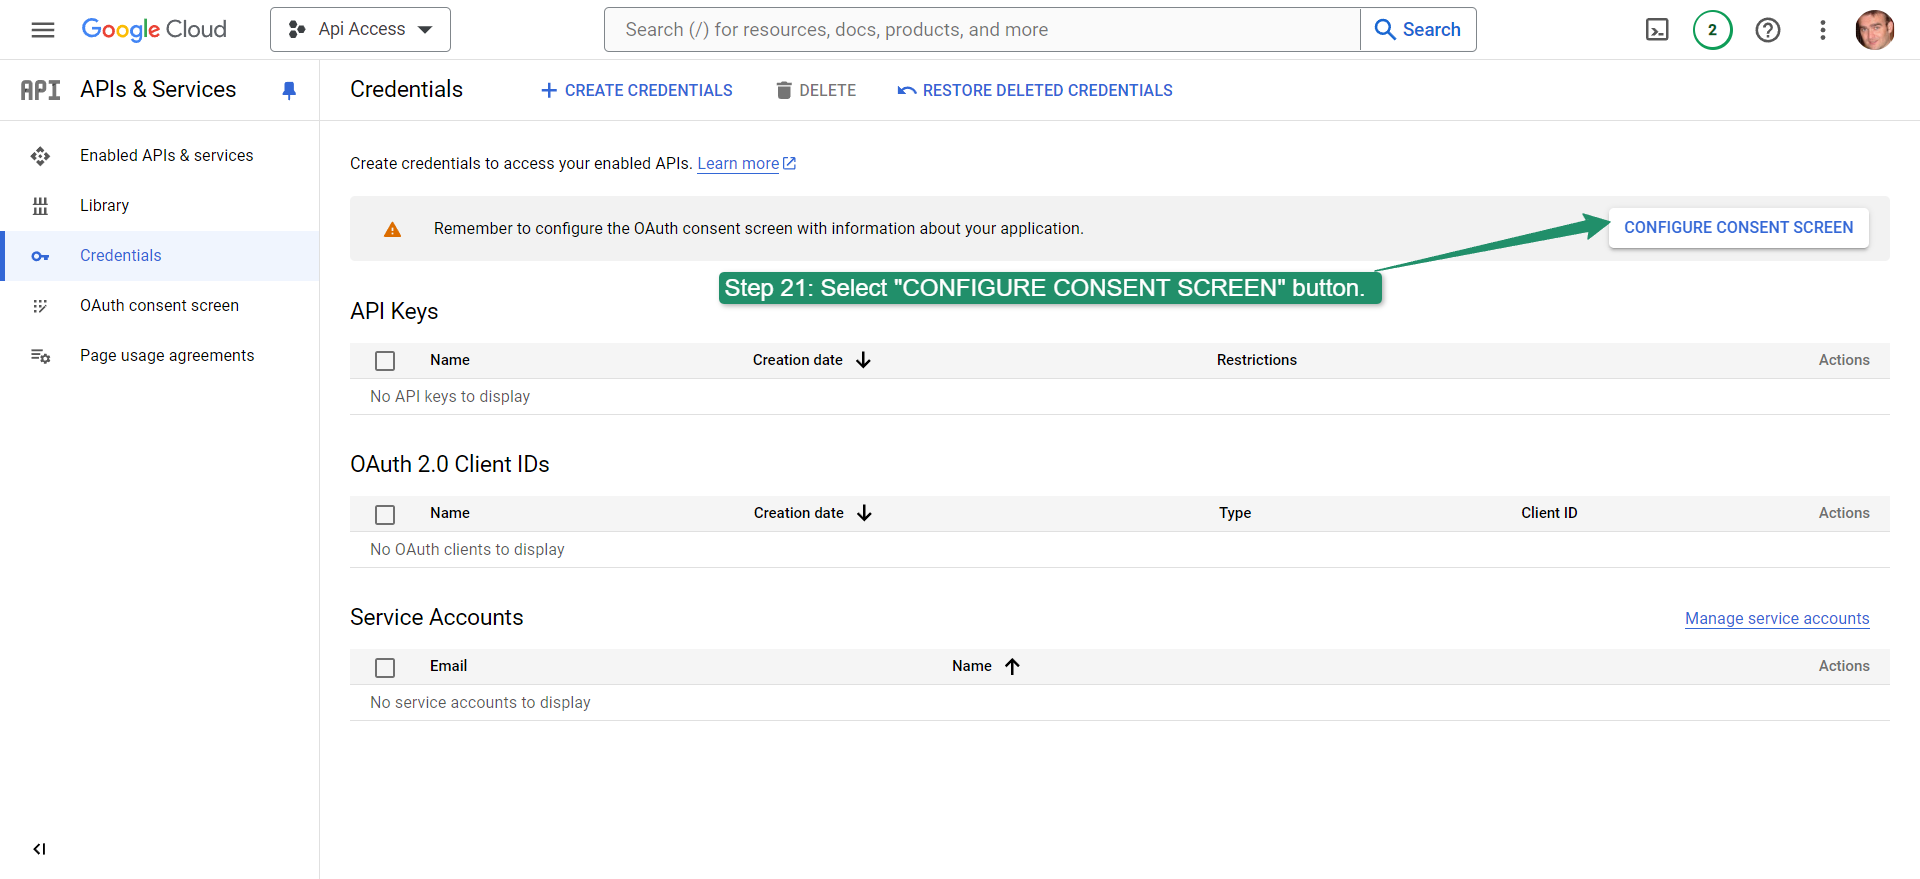
Steps 21
- Select the “CONFIGURE CONSENT SCREEN” button.
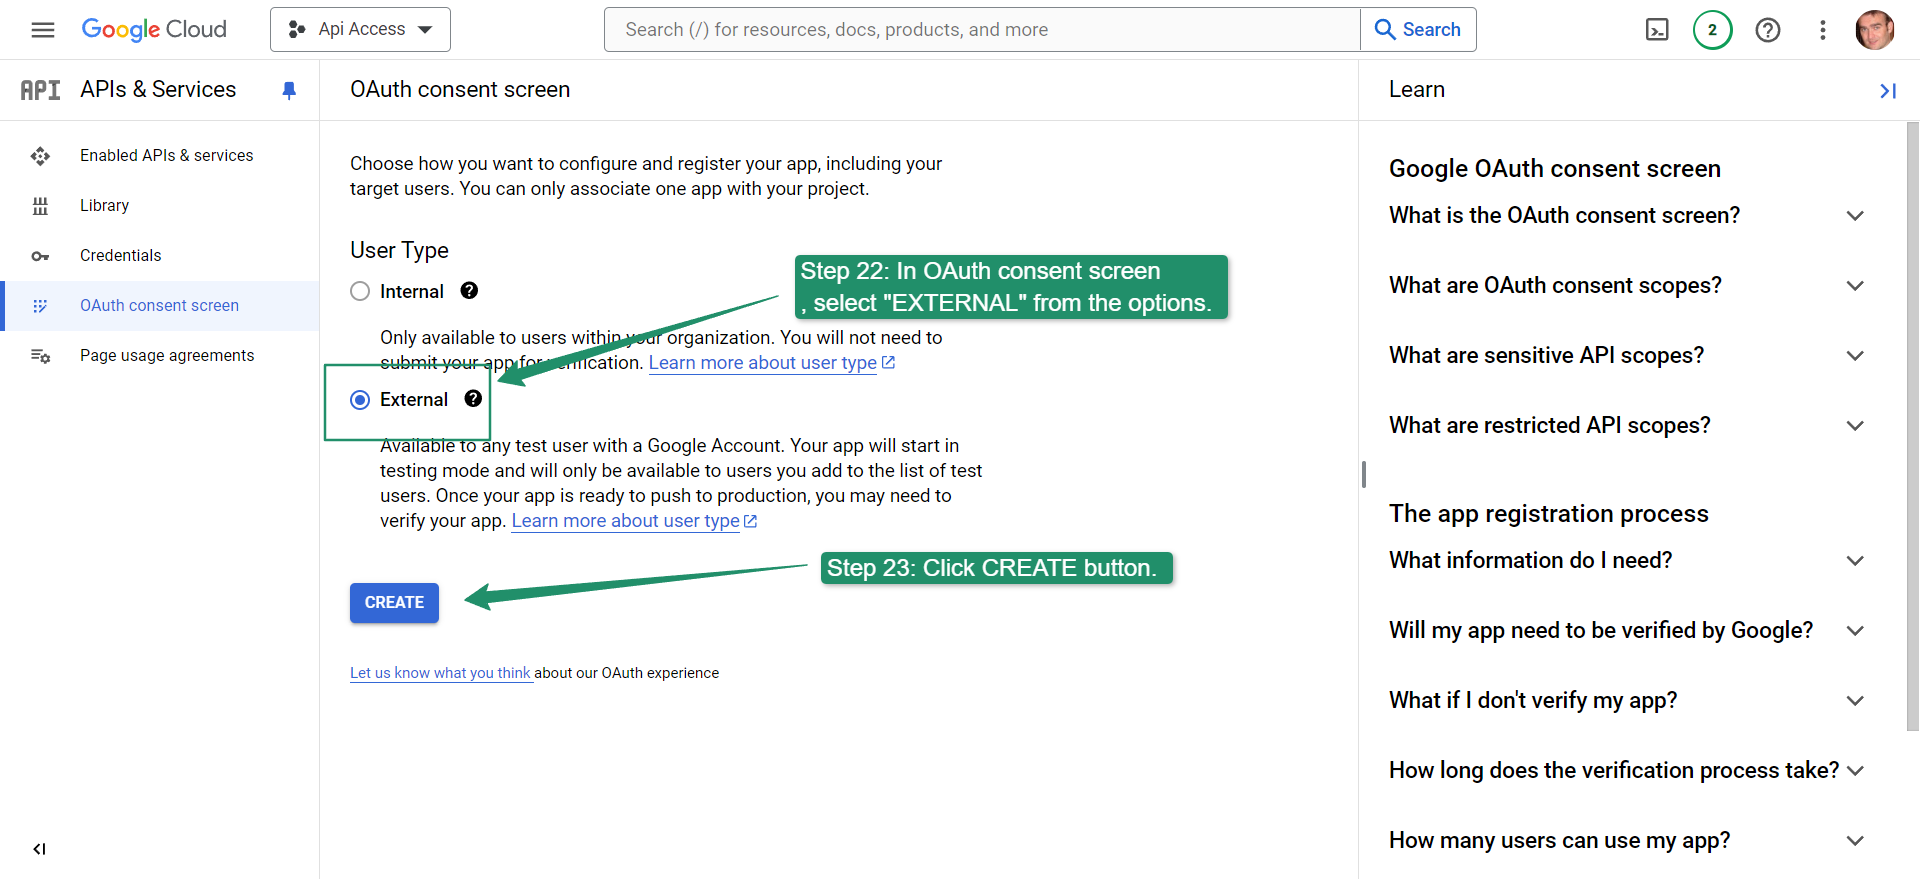
Steps 22-23
- In the OAuth consent screen, select “EXTERNAL” from the options.
- Click the CREATE button.
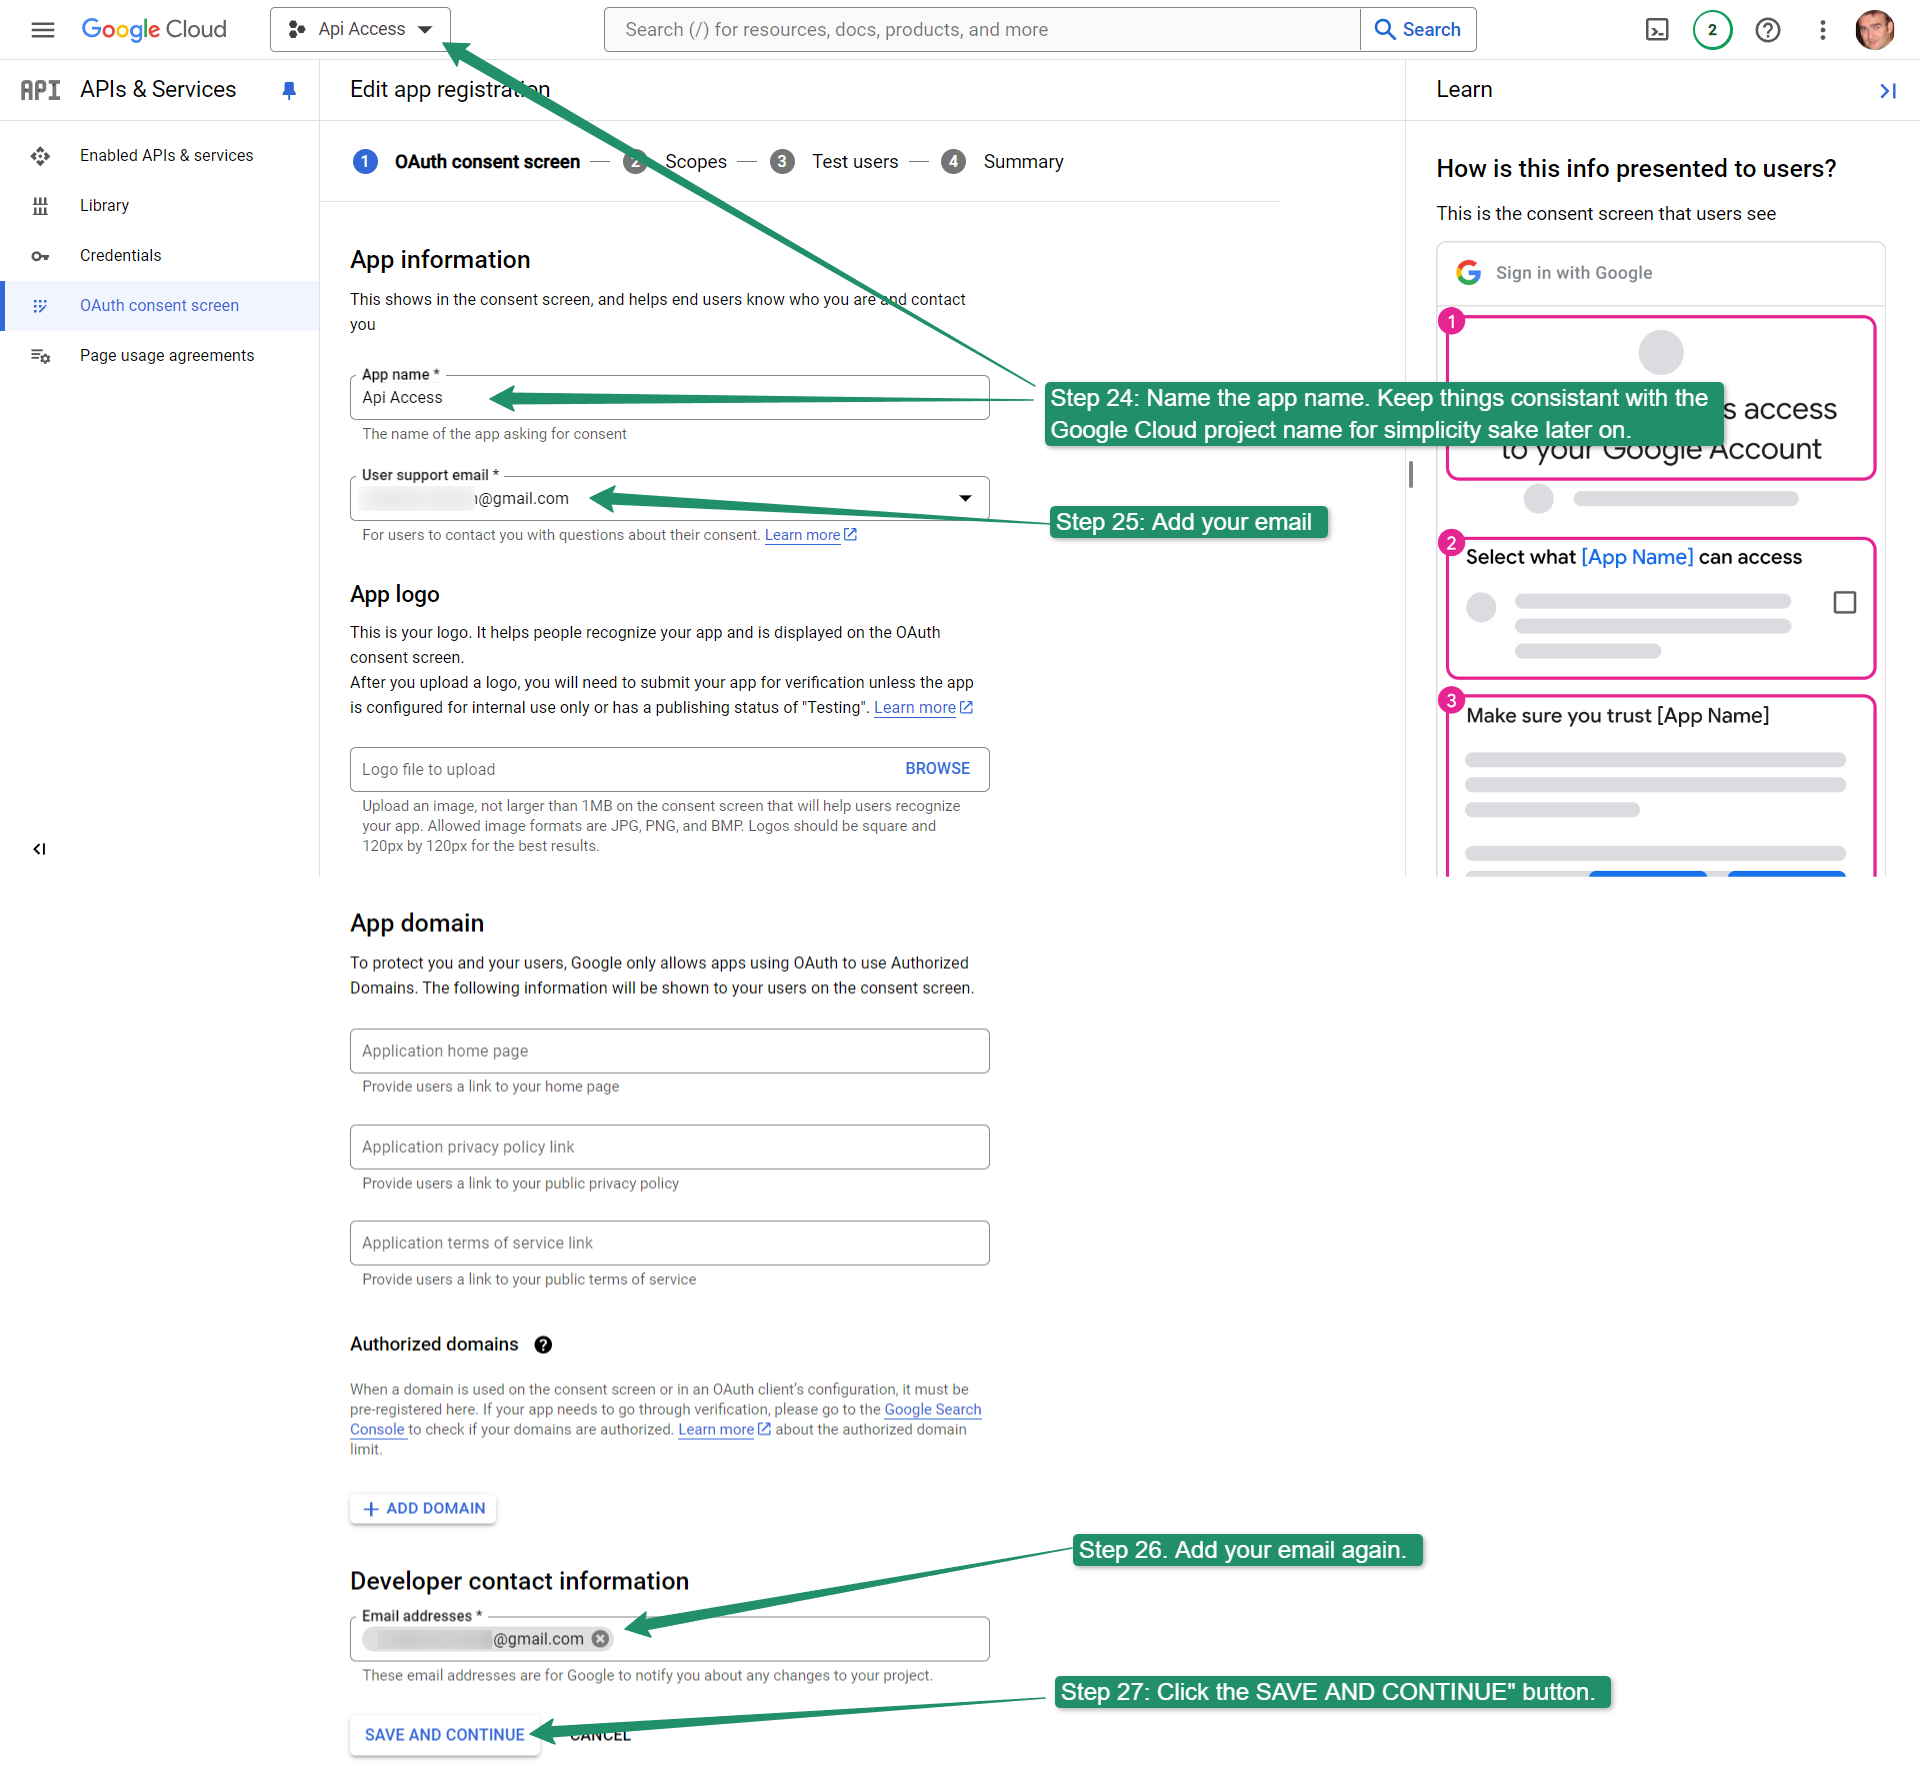
Steps 24-27
- Name the app name in “App name”. Keep things consistent with the Google Cloud project name for simplicity’s sake later on.
- Add your email to the “user support email”
- Add your email again to the developer contact info
- Click the “SAVE AND CONTINUE” button.
Steps 28-29
- x
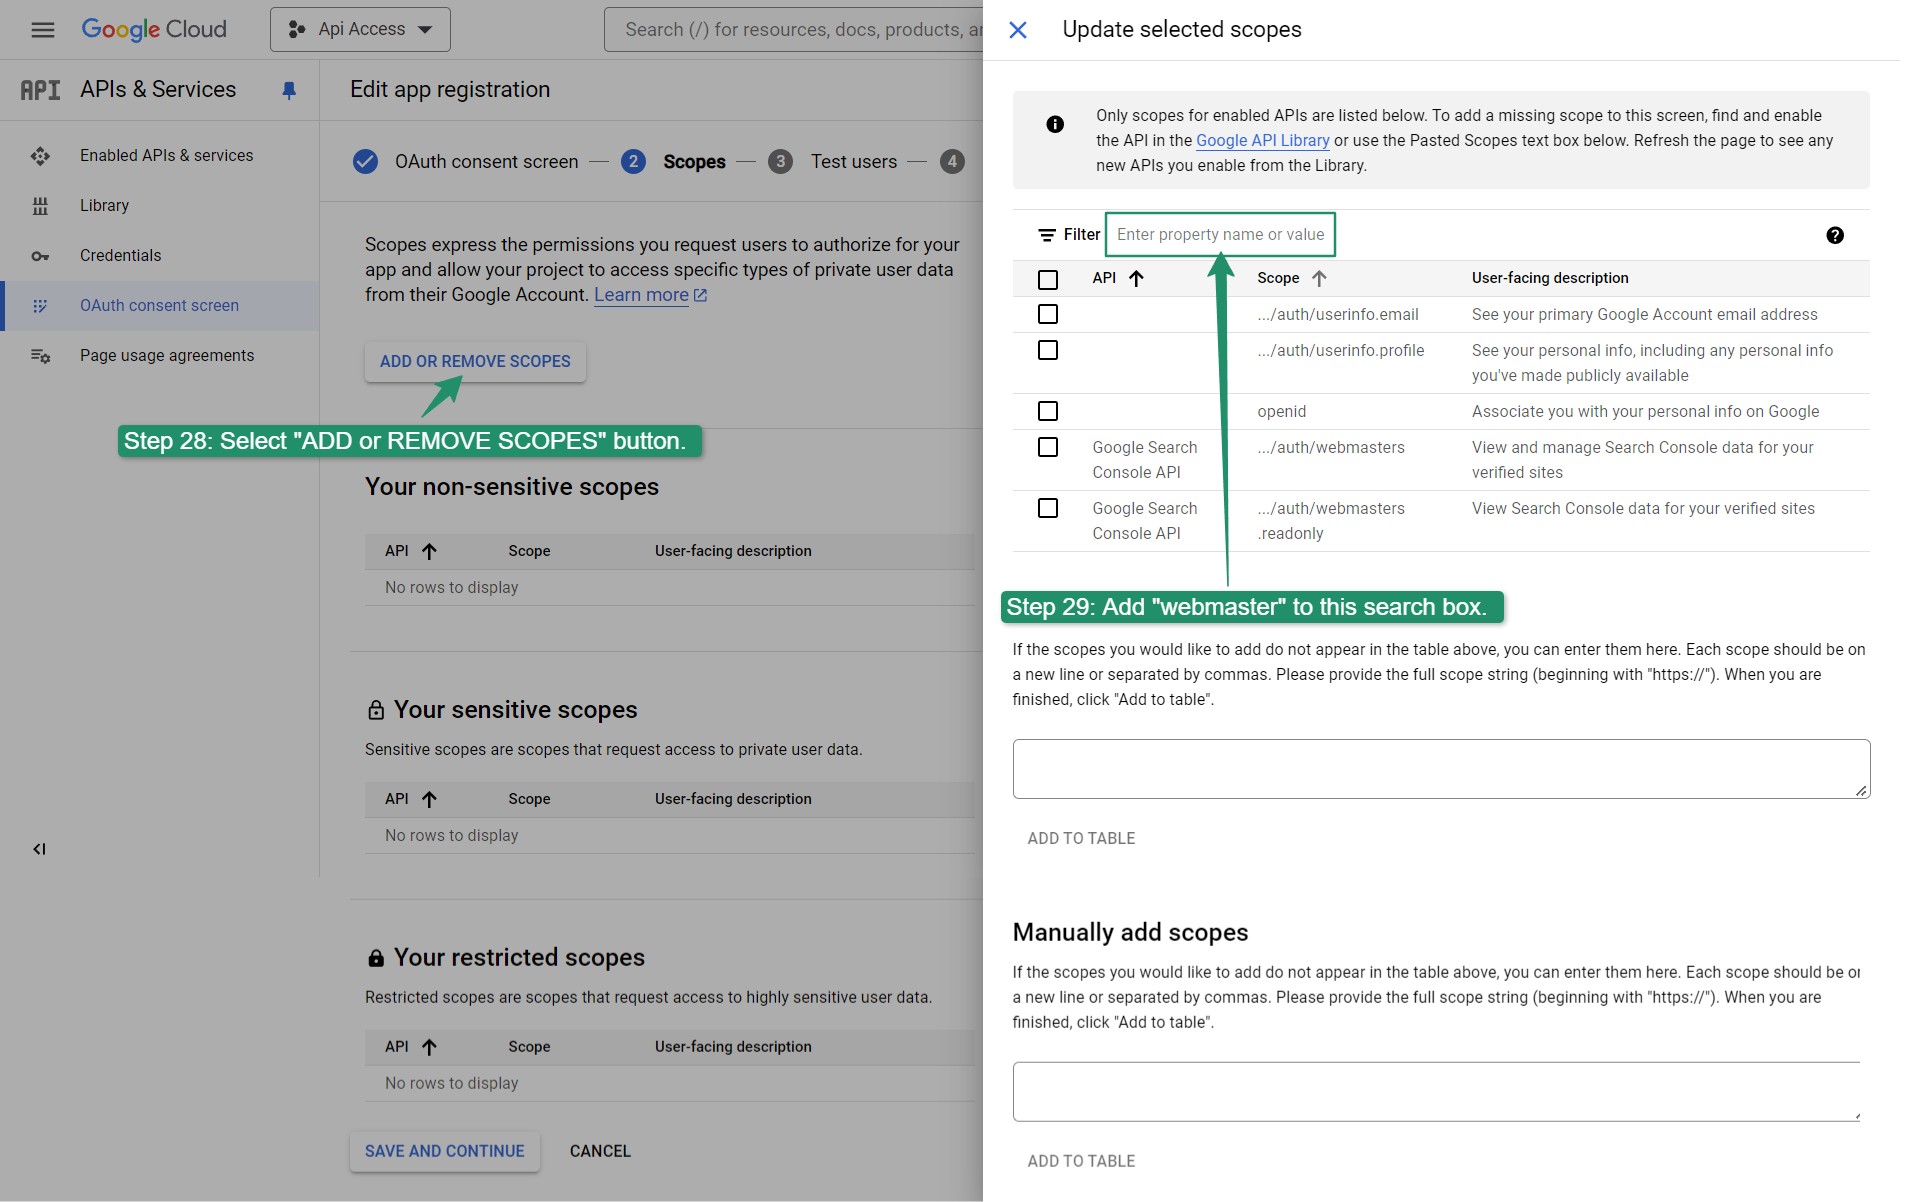
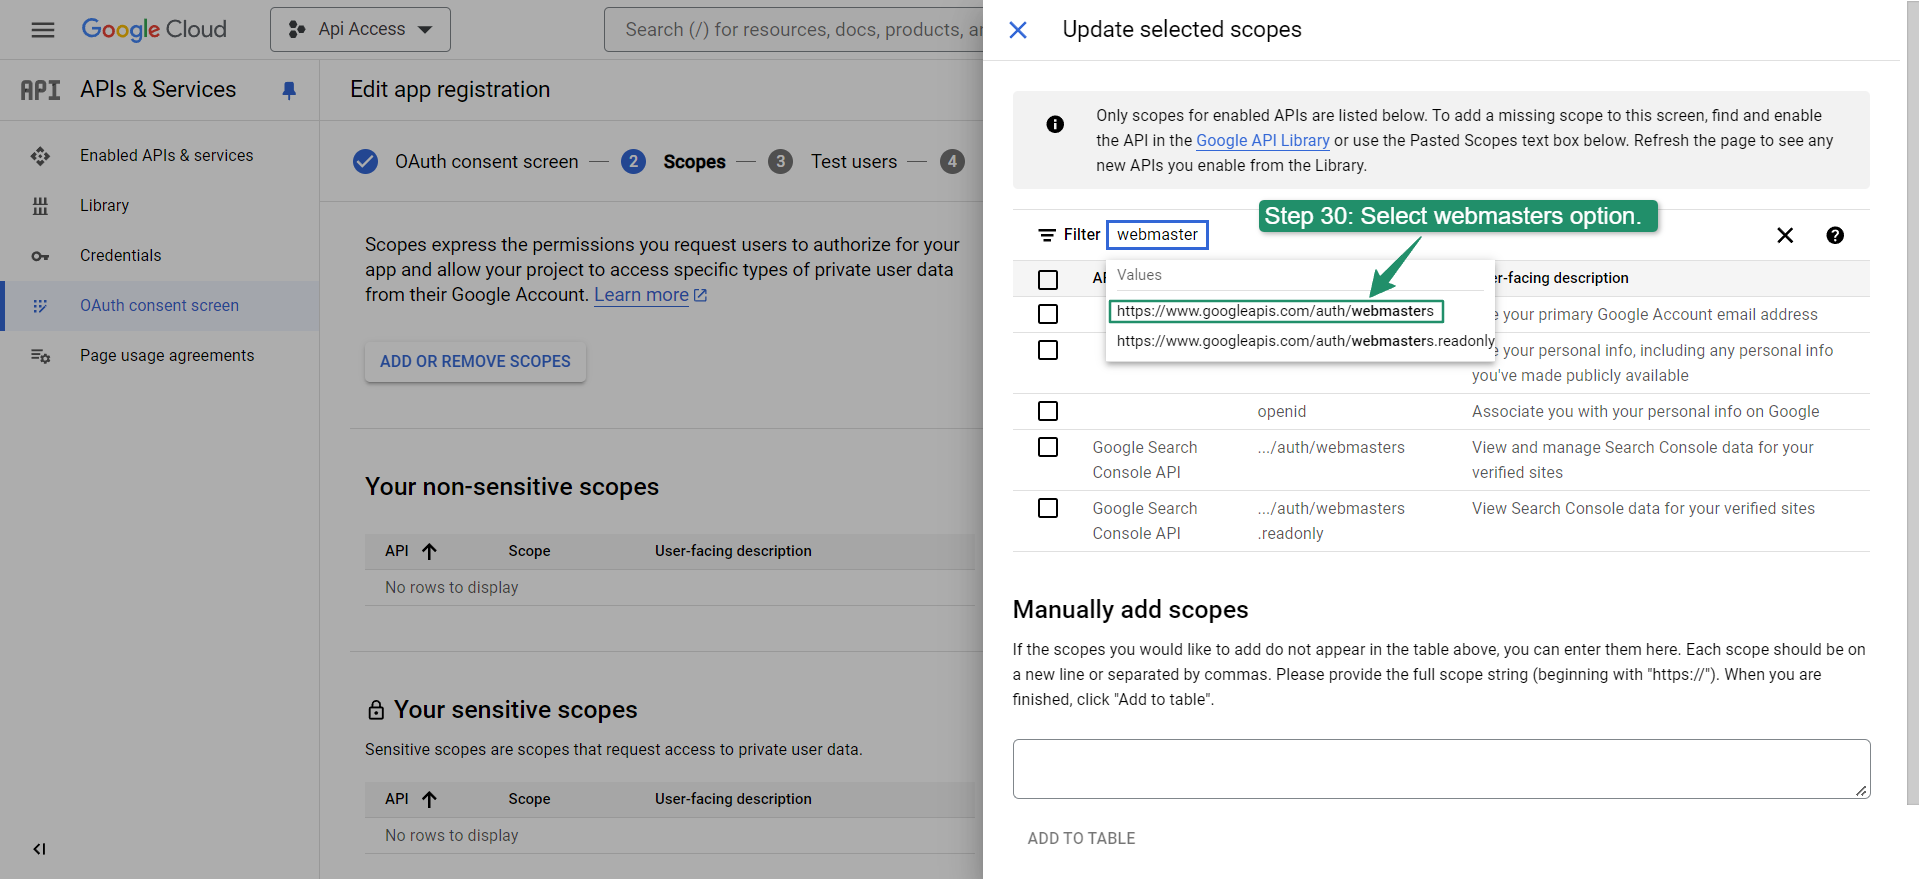
Steps 30
- Select
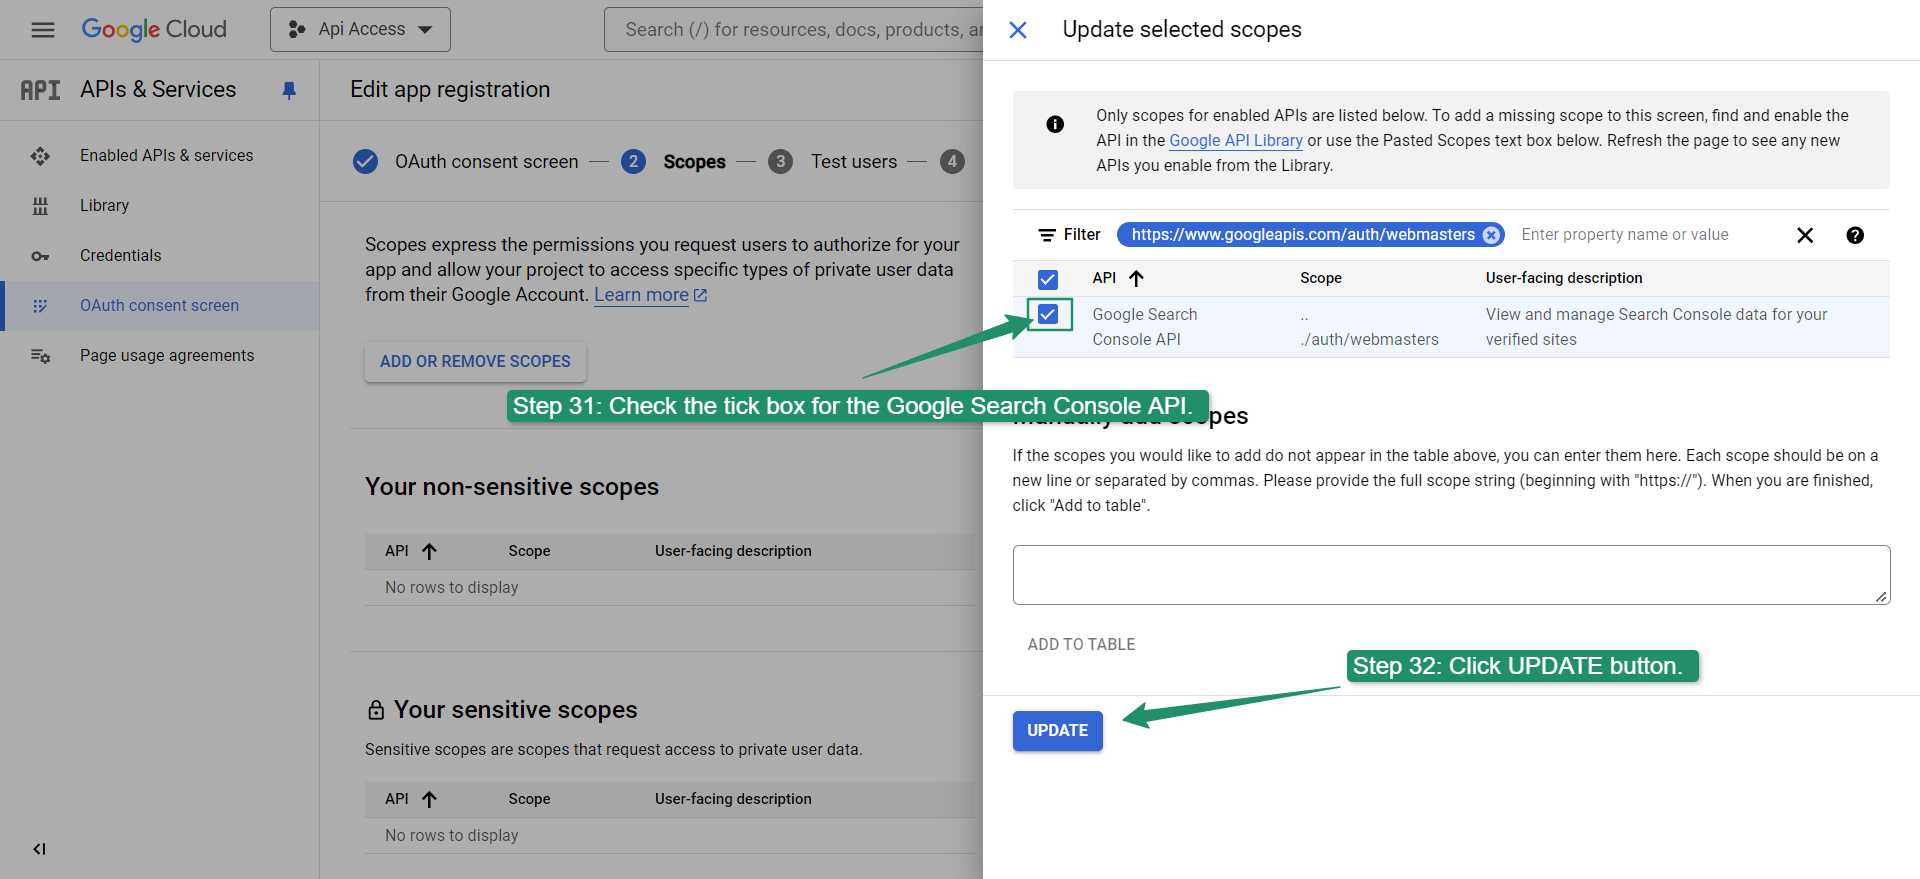
Steps 31-32
- Check the tick box for the Google Search Console API
- Click the “UPDATE” button.
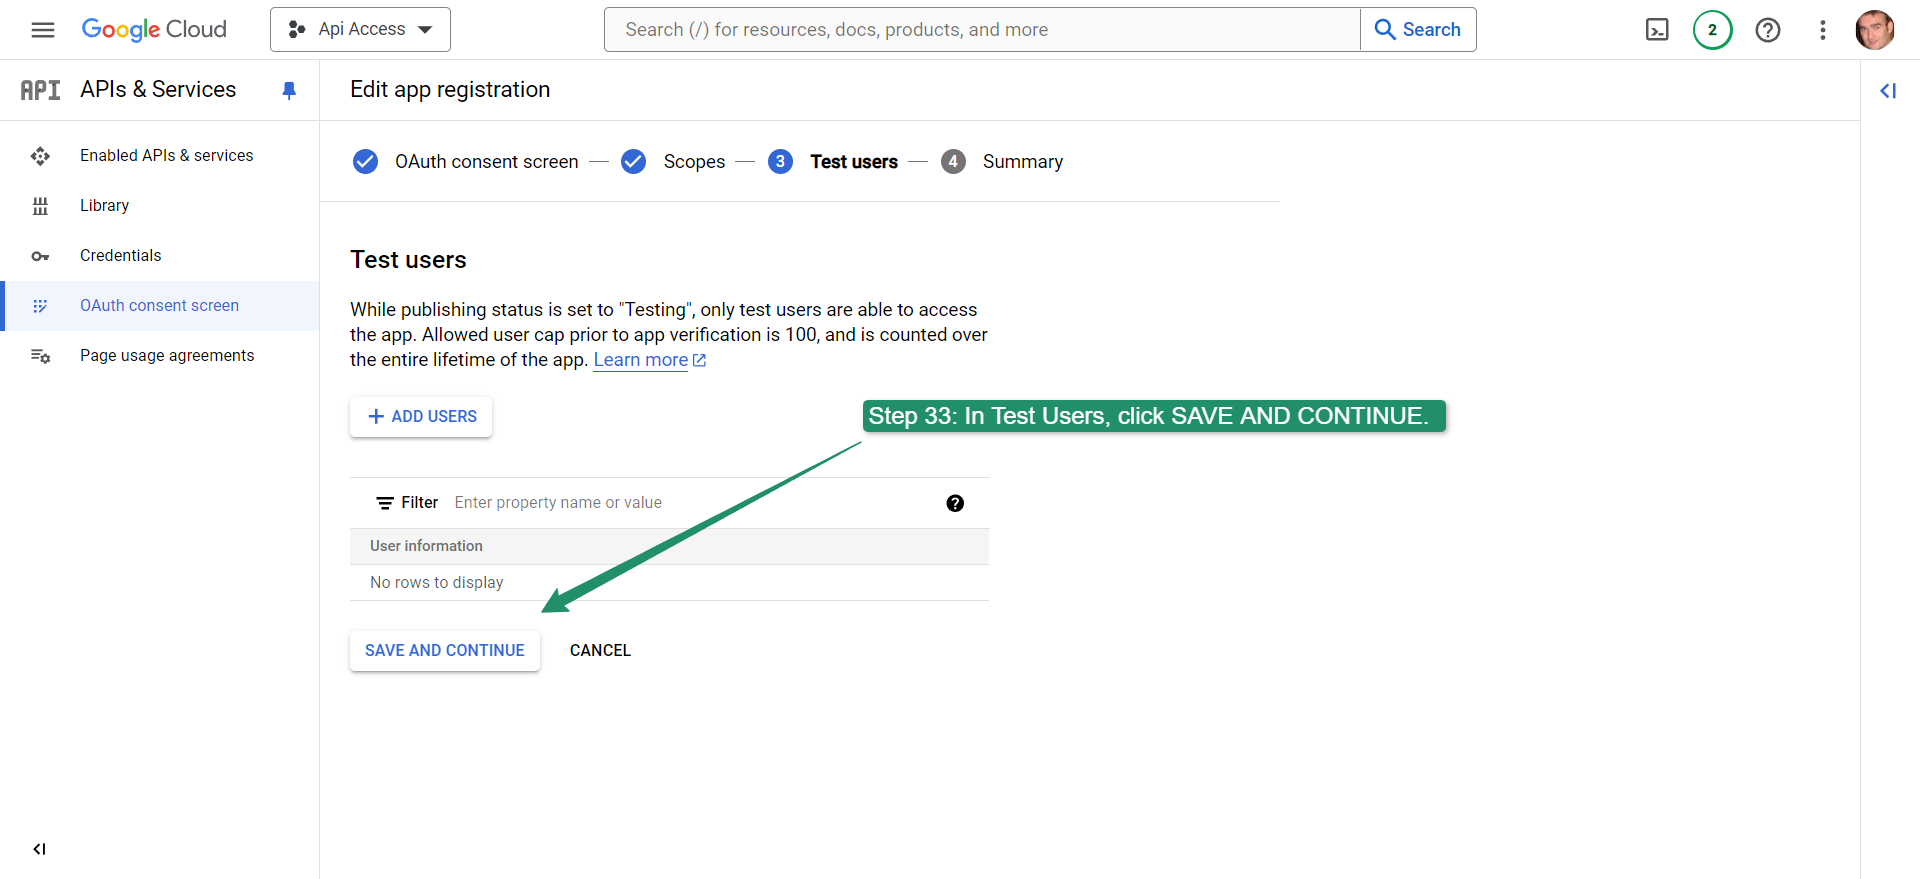
Step 33
- In Test Users, click SAVE AND CONTINUE.
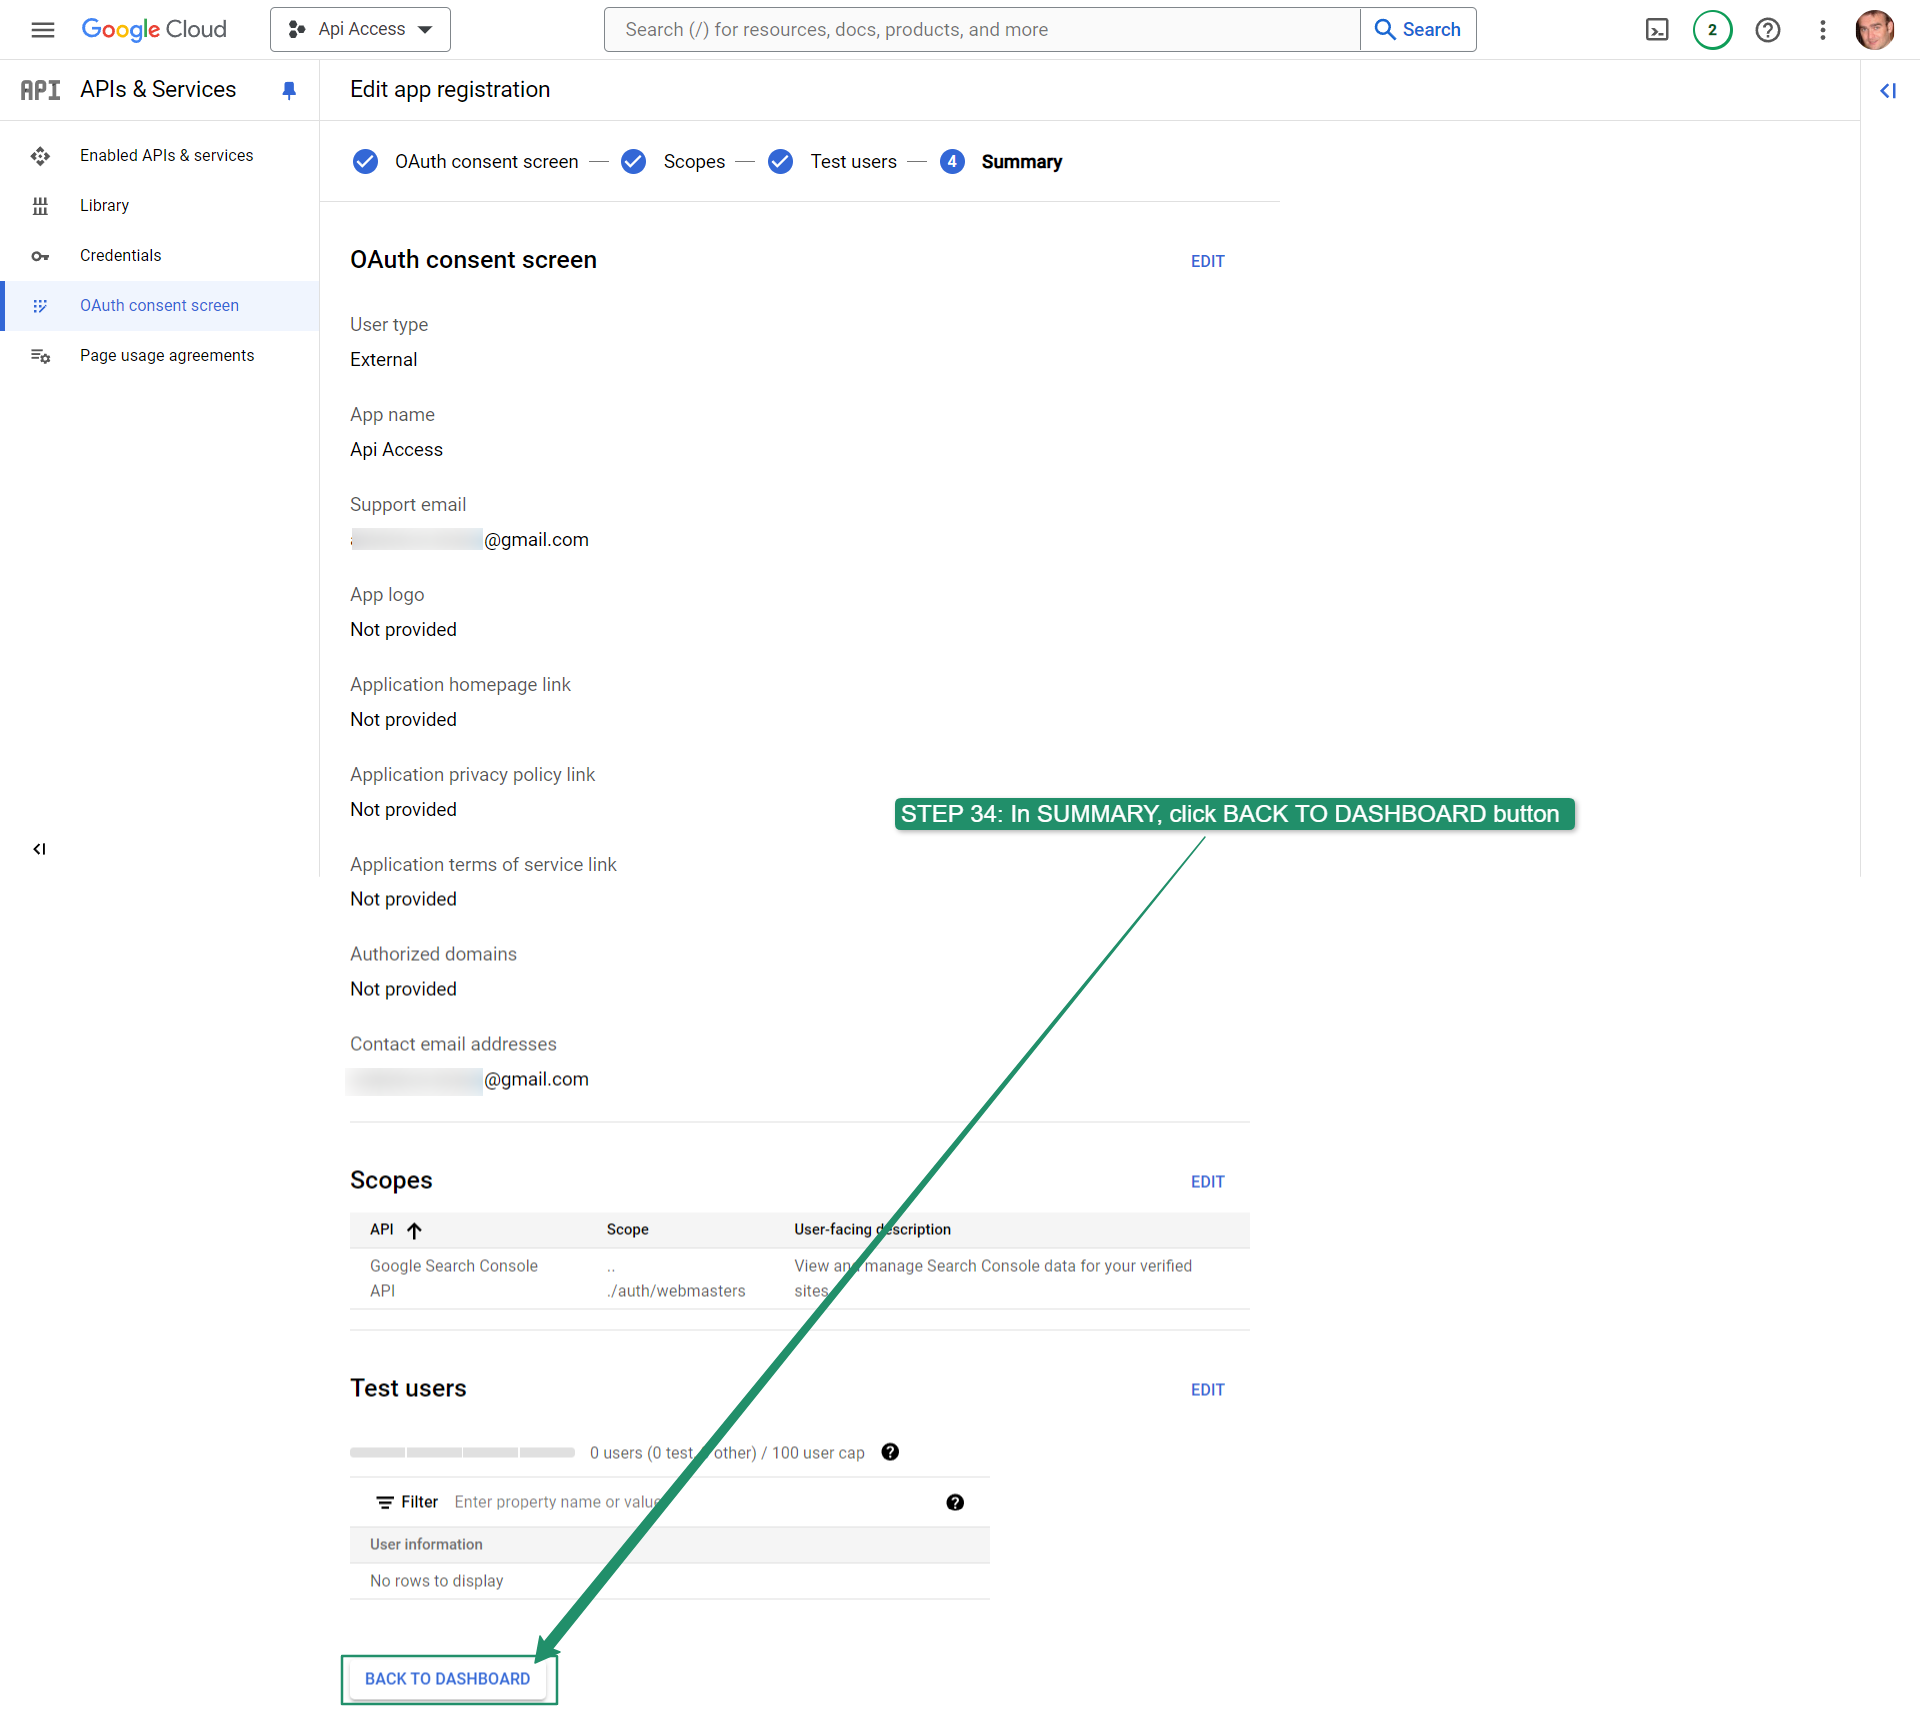
Step 34
- In SUMMARY, click BACK TO DASHBOARD button
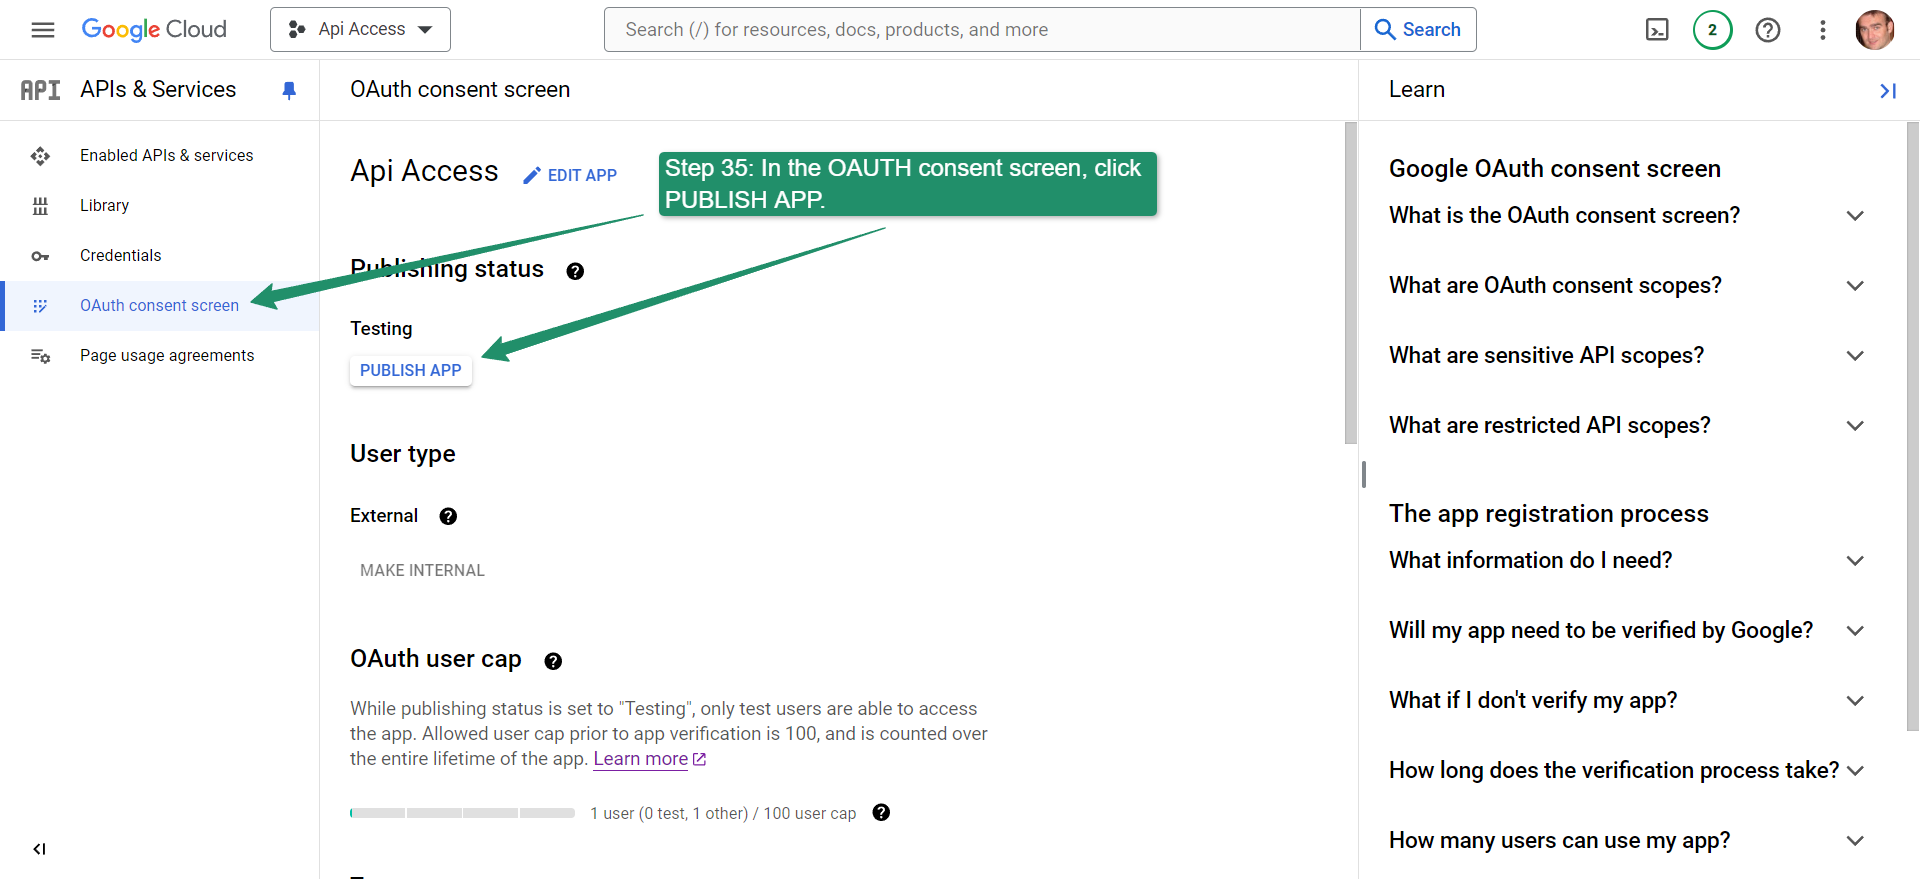
Step 35
- In OAuth consent screen, click “PUBLISH APP” button
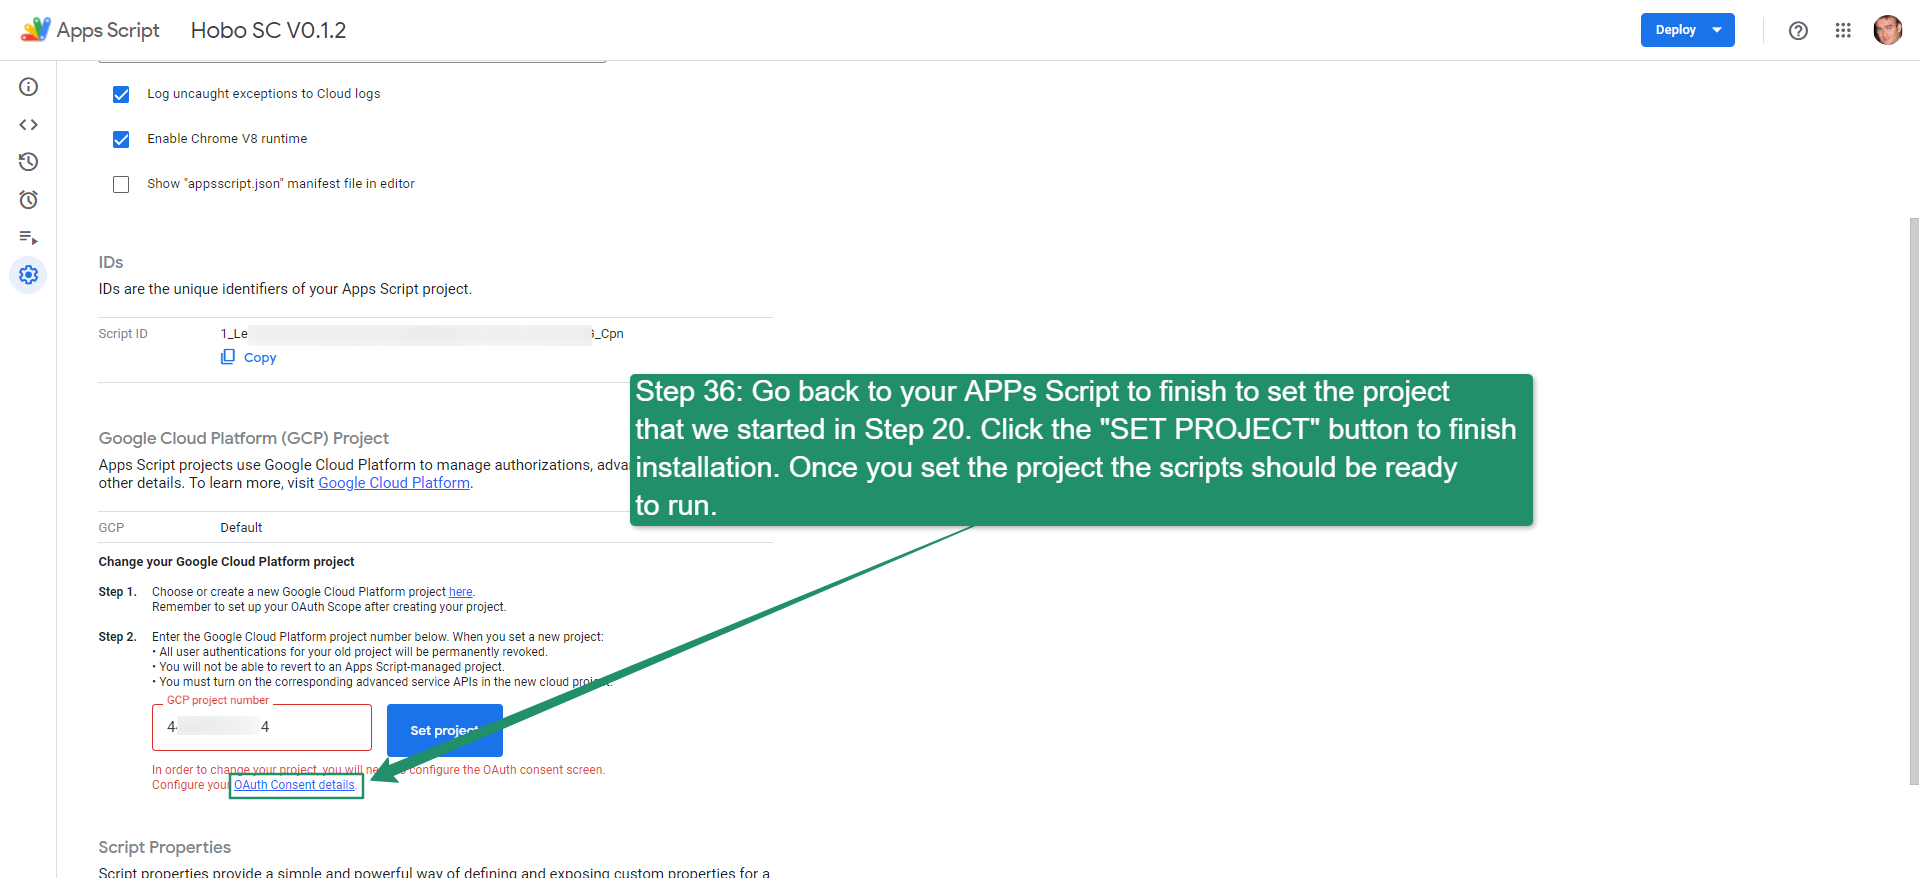
Step 36
- Go back to your APPs Script to finish to set the project that we started in Step 20. Click the “SET PROJECT” button to finish the installation. Once you set the project the scripts should be ready to run.
That should be you set up and good to go.
Read the full SEO Dashboard Installation guide.